
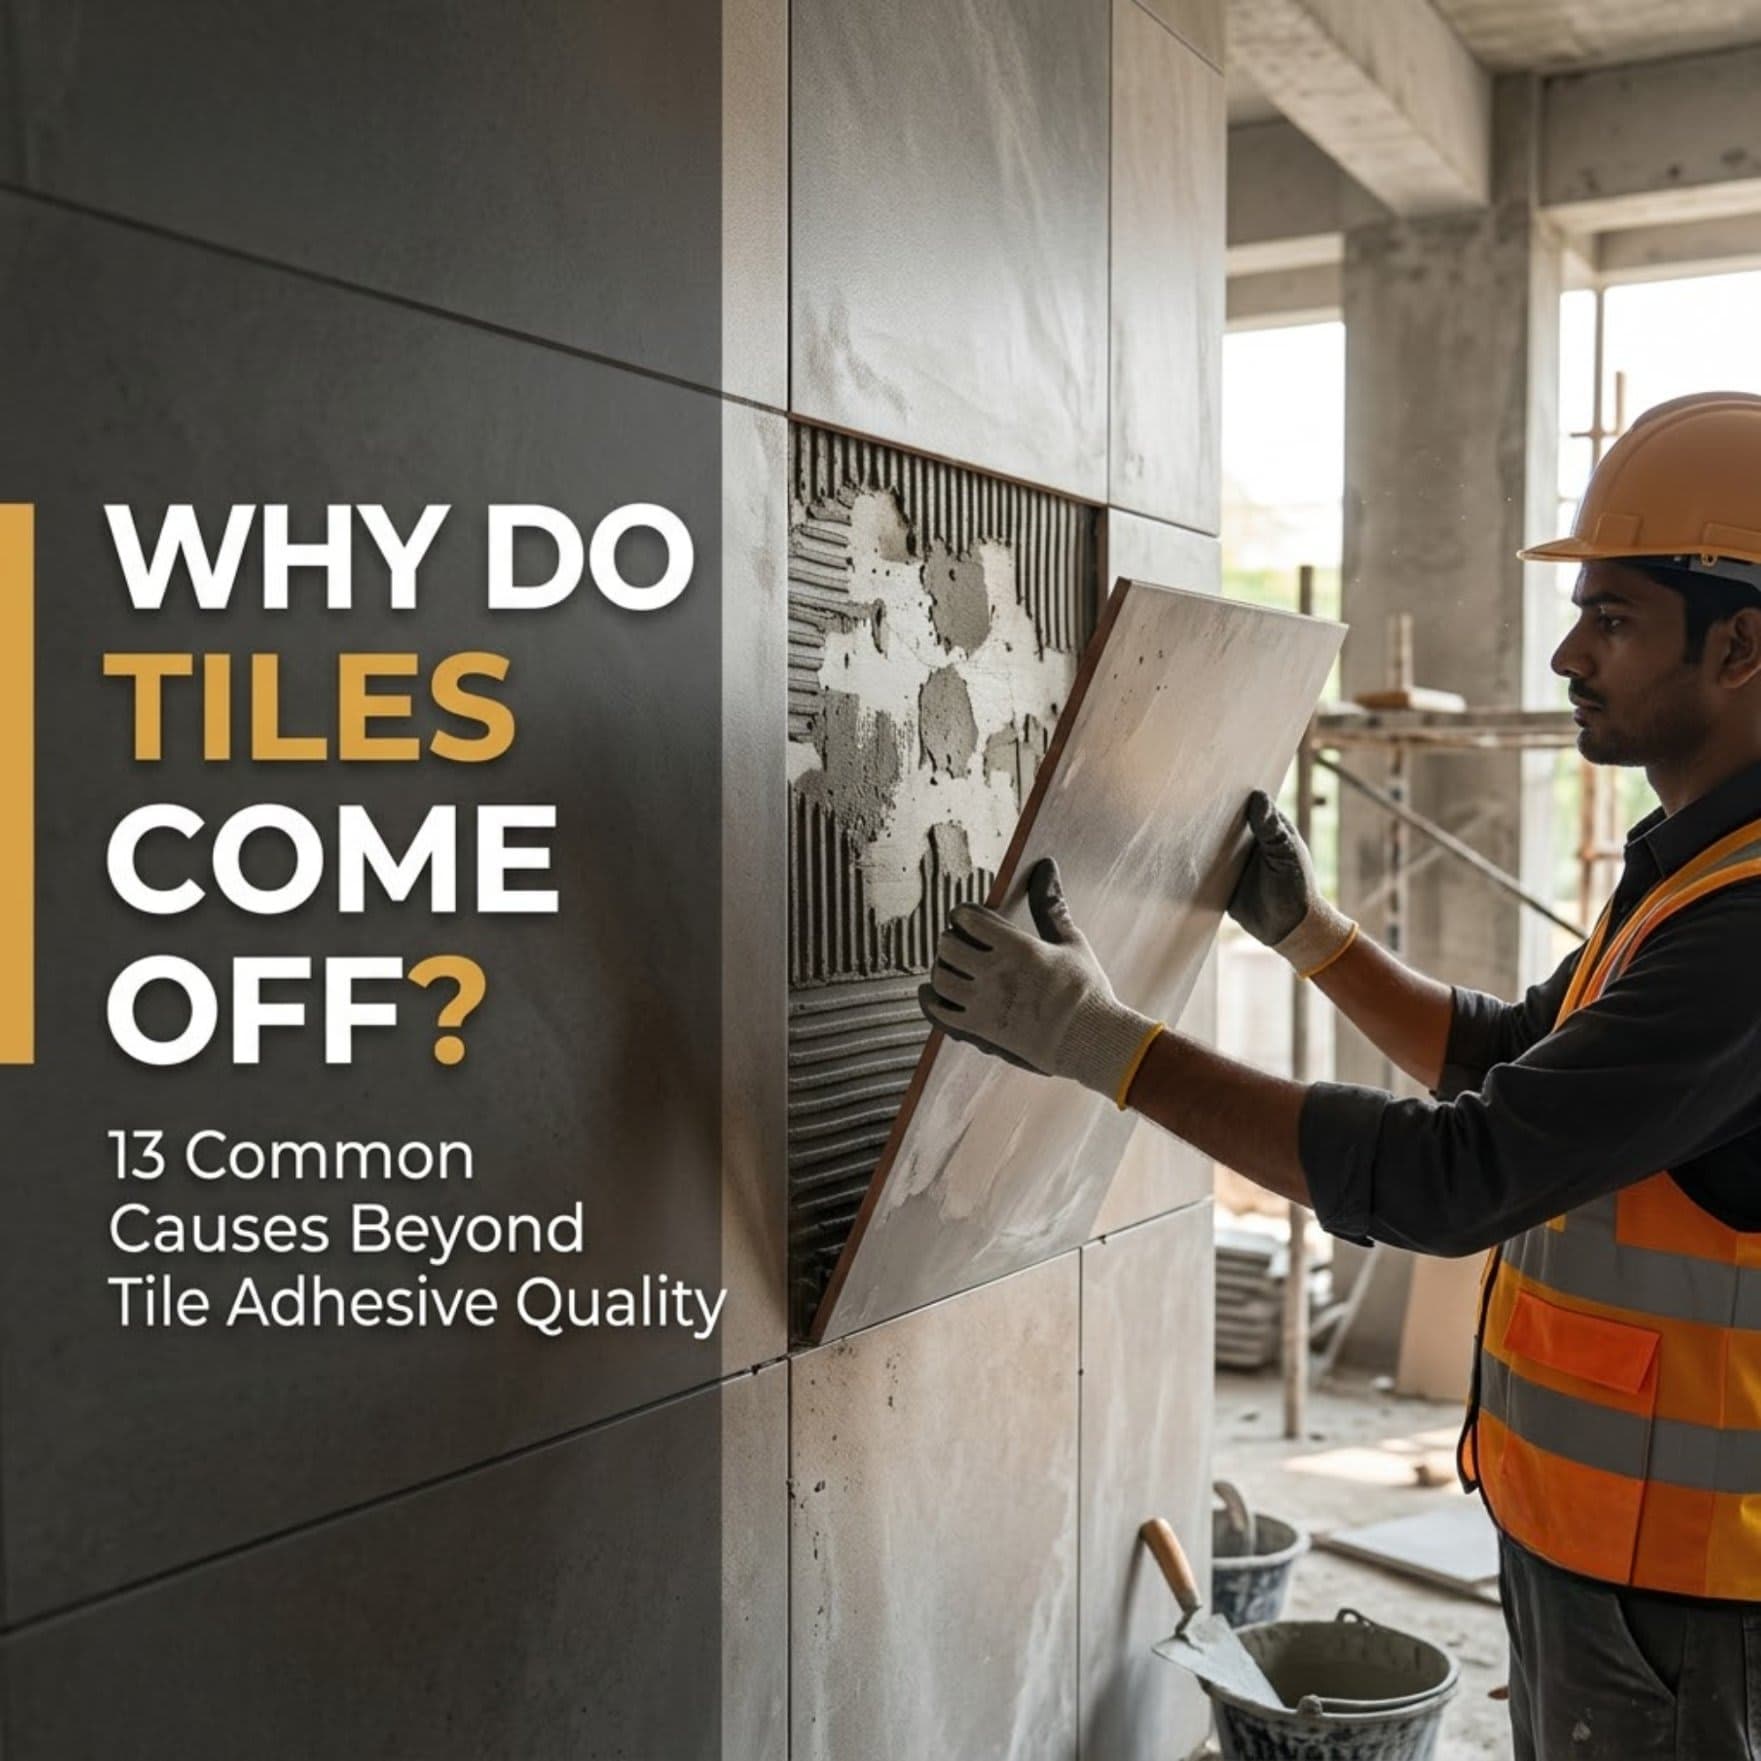
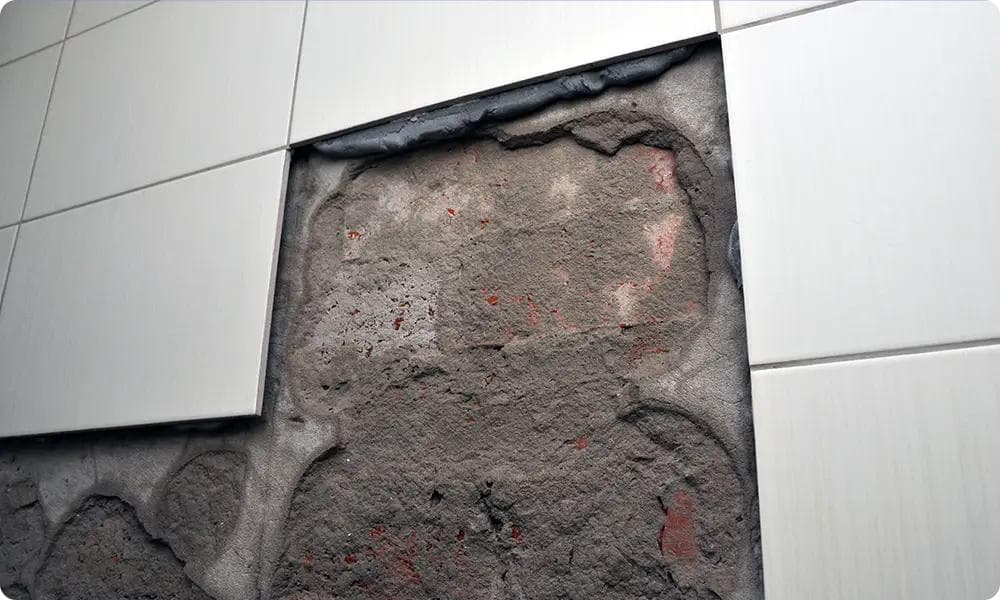
The problem of tiles coming off walls or floors is not caused by the quality of the tile adhesive alone. Weak plaster, muddy sand, dust behind the tiles, expiration of the 'Open Time', incorrect application methods, and mixing extra cement or sand into the adhesive can also affect the bonding. Let's look at the 13 main reasons for tiles coming off and their correct solutions.
दीवार या फर्श से टाइल निकलने की समस्या केवल टाइल एडहेसिव की गुणवत्ता के कारण ही नहीं होती। कमजोर प्लास्टर, मिट्टी वाली रेत, टाइल के पीछे धूल, Open Time समाप्त होना, गलत लगाने का तरीका और एडहेसिव में अतिरिक्त सीमेंट या रेत मिलाना भी बॉन्डिंग को प्रभावित कर सकता है। आइए जानते हैं टाइल निकलने के 13 मुख्य कारण और उनके सही समाधान।
ટાઇલ દિવાલ કે ફ્લોર પરથી છૂટી જવાની સમસ્યા માત્ર ટાઇલ એડહેસિવની ગુણવત્તાને કારણે જ થાય એવું જરૂરી નથી. નબળું પ્લાસ્ટર, માટીવાળી રેતી, ટાઇલની પાછળની ધૂળ, Open Time પૂરો થવો, ખોટી એપ્લિકેશન અને એડહેસિવમાં વધારાનું સિમેન્ટ કે રેતી ઉમેરવી જેવી બાબતો પણ બોન્ડિંગને અસર કરી શકે છે. ટાઇલ છૂટી જવાનાં 13 મુખ્ય કારણો અને તેના યોગ્ય ઉકેલો જાણીએ.
Introduction
When tiles become loose or come off the wall or floor, many people immediately blame the tile adhesive. However, tile detachment does not always happen because of poor adhesive quality.
Several factors can affect tile bonding, including surface preparation, adhesive application, water ratio, mixing methods, tile characteristics, plaster strength, site conditions, and installation practices.
Even a good-quality tile adhesive may not perform properly if it is used incorrectly or if the site conditions are unsuitable.
In this blog, we will explain 13 important reasons why tiles may become loose or detach, along with practical solutions to help prevent these problems.
टाइल लगाने के कुछ दिनों या महीनों बाद जब टाइल निकलने लगती है, तो अक्सर सबसे पहले टाइल एडहेसिव की गुणवत्ता पर सवाल उठाया जाता है।
लेकिन टाइल की बॉन्डिंग केवल एडहेसिव पर निर्भर नहीं करती। यह टाइल, एडहेसिव, प्लास्टर या अन्य आधार की सतह, मिक्सिंग की विधि और साइट पर काम करने के सही तरीके पर भी निर्भर करती है।
यदि इनमें से किसी एक चीज़ में भी कमी हो, तो टाइल निकलने की समस्या हो सकती है।
इसलिए टाइल निकलने पर केवल एडहेसिव को दोष देने के बजाय समस्या का वास्तविक कारण पता लगाना ज़रूरी है।
ટાઇલ લગાવ્યા પછી થોડા દિવસો કે મહિનાઓમાં ટાઇલ છૂટી જાય ત્યારે ઘણી વખત સૌથી પહેલાં ટાઇલ એડહેસિવની ગુણવત્તા પર સવાલ ઊભો થાય છે.
પરંતુ ટાઇલનું બોન્ડિંગ માત્ર એડહેસિવ પર આધારિત નથી. તે ટાઇલ, એડહેસિવ, પ્લાસ્ટર અથવા અન્ય આધારની સપાટી, મિક્સિંગની પદ્ધતિ અને સાઇટ પર કરવામાં આવતી કામગીરી — આ બધાં પર આધારિત છે.
જો આમાંથી કોઈ એક બાબતમાં ખામી હોય, તો ટાઇલ છૂટી જવાની સમસ્યા ઊભી થઈ શકે છે.
આથી, ટાઇલ છૂટી જાય ત્યારે માત્ર એડહેસિવને દોષ આપવાને બદલે તેનું સાચું કારણ શોધવું જરૂરી છે.
1. Open Time समाप्त हो जाना
दीवार पर एडहेसिव लगाने के बाद यदि लंबे समय तक टाइल नहीं लगाई जाती, तो एडहेसिव की सतह पर एक पतली परत बन सकती है। ऐसी स्थिति में टाइल और एडहेसिव के बीच पर्याप्त संपर्क नहीं बन पाता।
समाधान:
- एक बार में कम क्षेत्र में एडहेसिव लगाएँ।
- निर्धारित Open Time के अंदर टाइल लगाएँ।
- यदि एडहेसिव की सतह पर परत बन गई है, तो उसके ऊपर सीधे टाइल न लगाएँ।
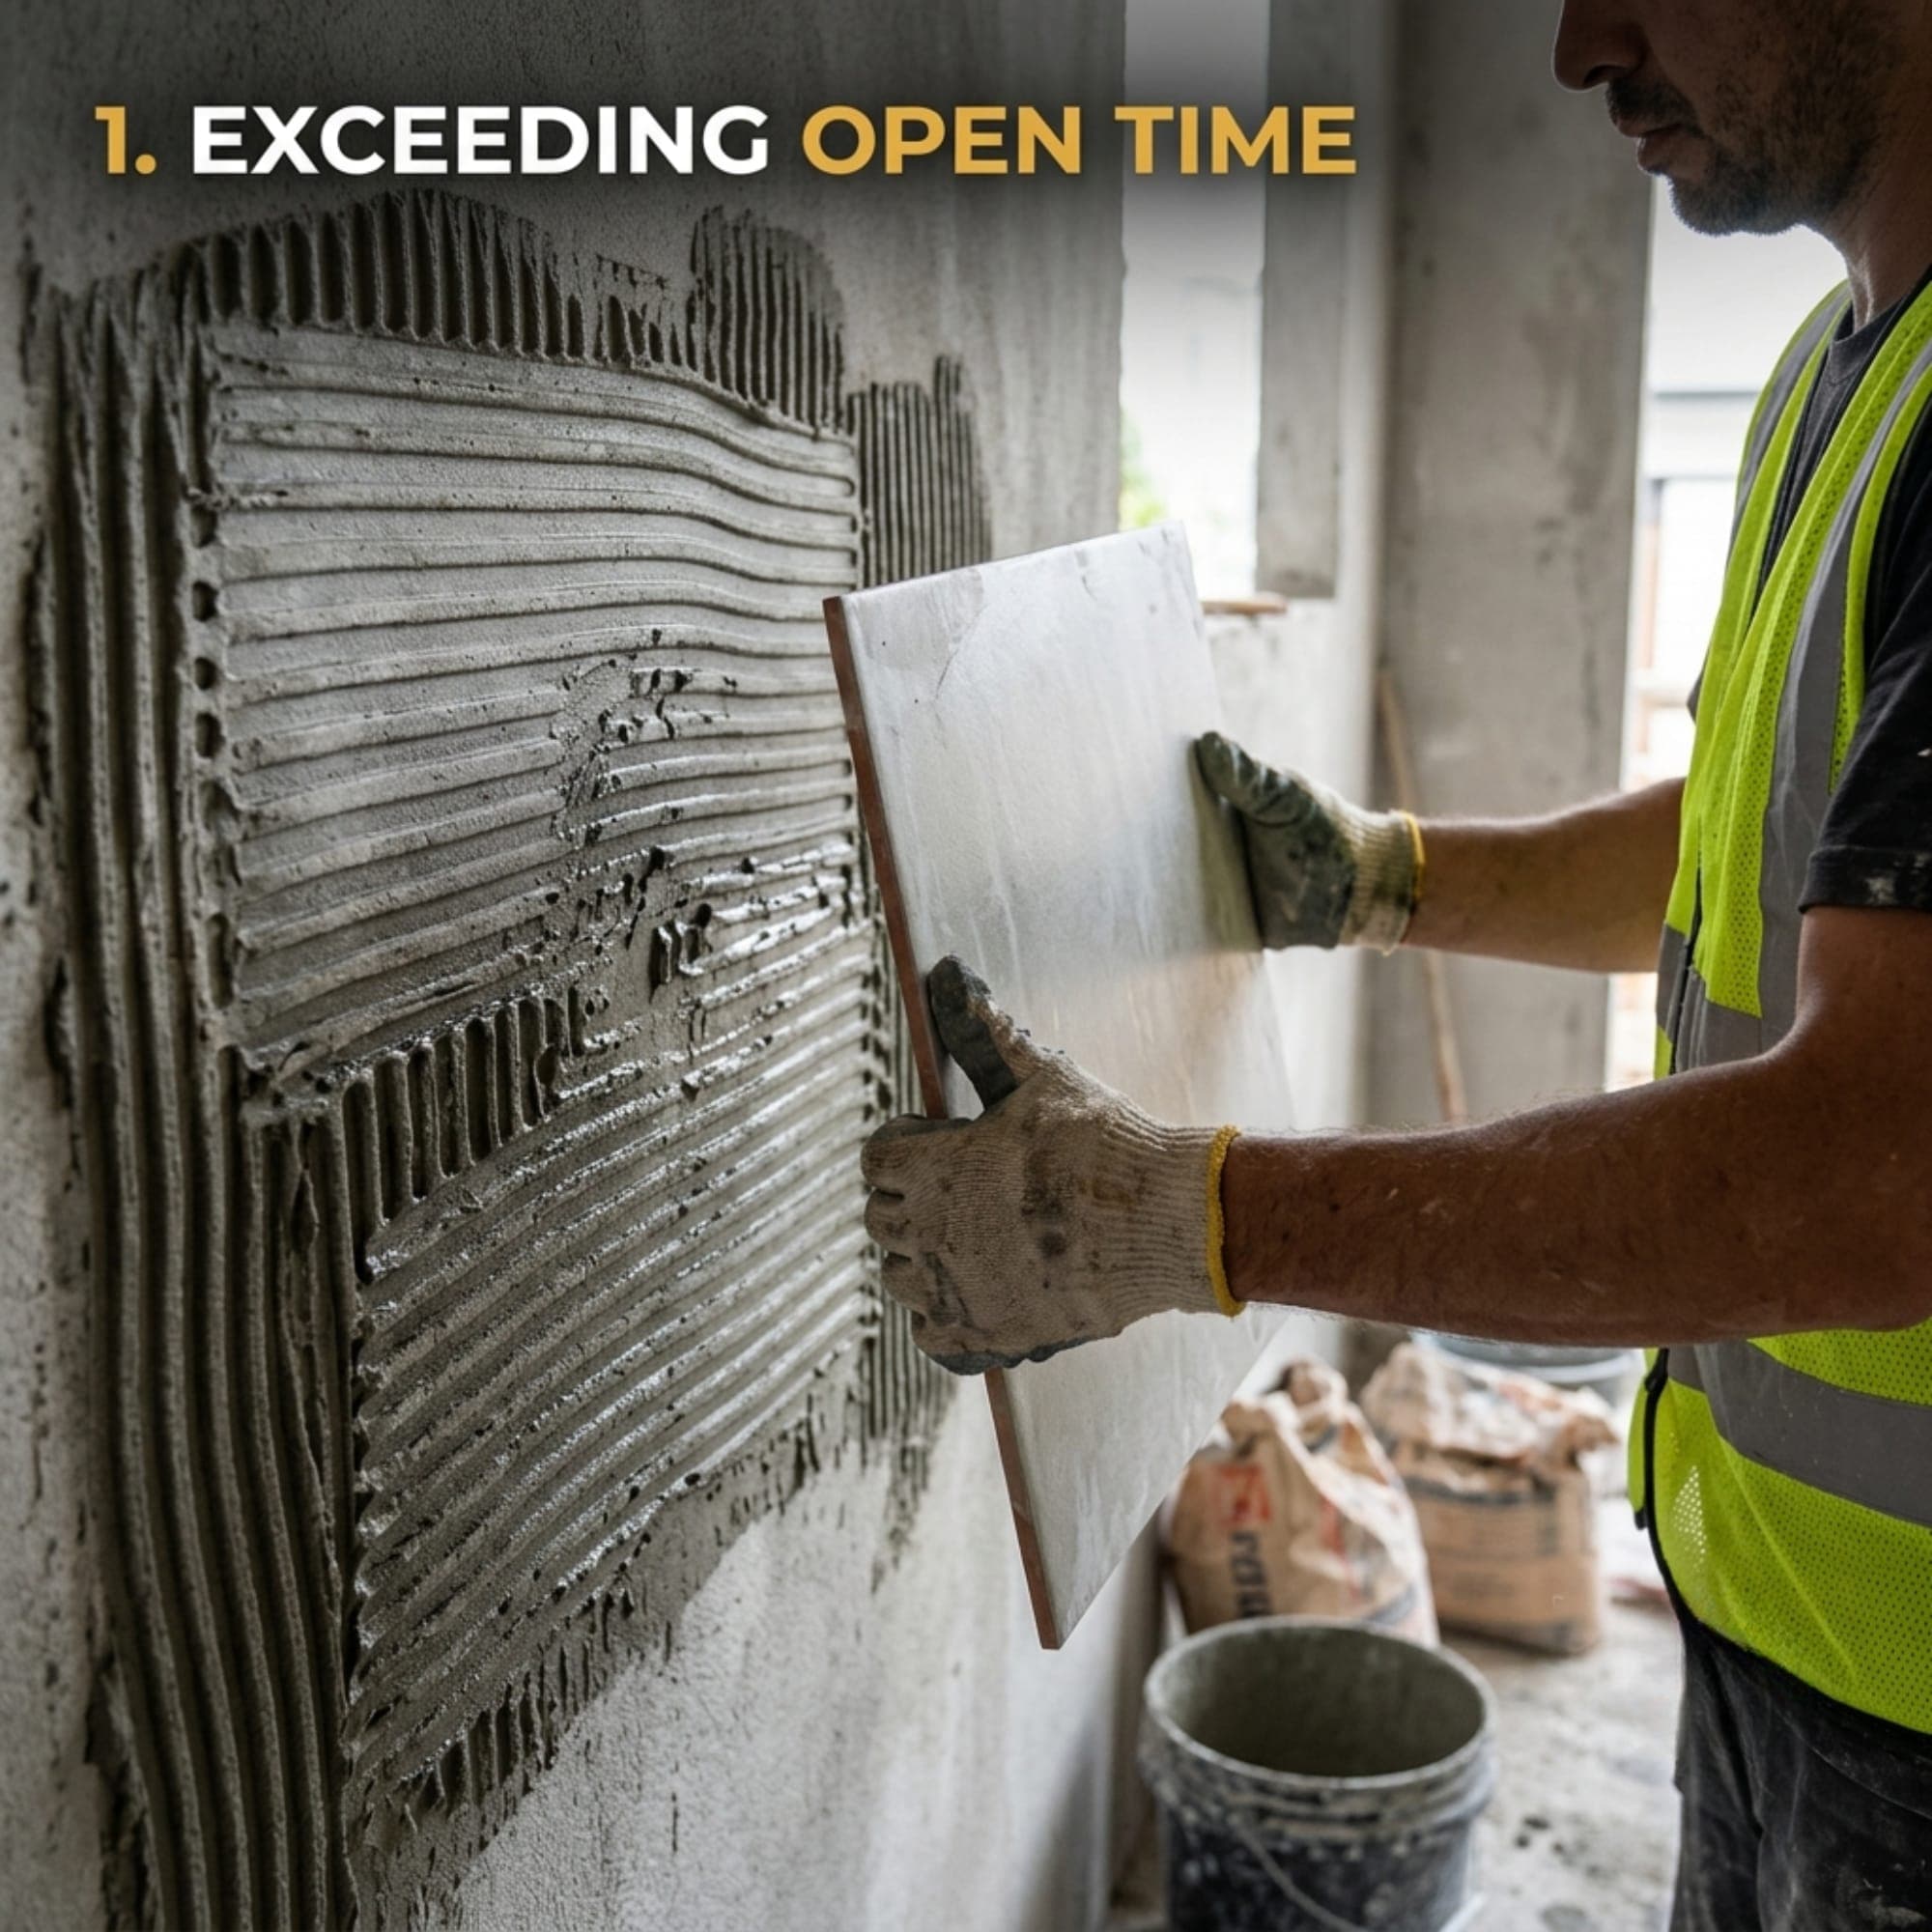
Exceeding the Open Time of Tile Adhesive
Every tile adhesive has a specific open time. Open time is the period during which the applied adhesive remains suitable for fixing tiles.
If the adhesive is spread over a large area and tiles are not fixed within the recommended time, a dry layer or skin may form on the adhesive surface. When a tile is placed over this layer, proper bonding may not occur.
Solution:
- Apply adhesive only to an area that can be tiled within the recommended open time.
- Avoid fixing tiles over adhesive that has developed a dry skin.
- Follow the product's technical data sheet for open time and site conditions.
Open Time પૂરો થઈ જવો
દિવાલ પર એડહેસિવ લગાવ્યા પછી લાંબો સમય ટાઇલ બેસાડવામાં ન આવે, તો તેની સપાટી પર પાતળું પડ બની શકે છે. આવી સ્થિતિમાં ટાઇલ અને એડહેસિવ વચ્ચે પૂરતો સંપર્ક થતો નથી.
ઉકેલ:
- નાની જગ્યામાં એડહેસિવ લગાવો.
- એડહેસિવની નિર્ધારિત Open Time મર્યાદામાં ટાઇલ બેસાડો.
- સપાટી પર પડ બની ગયા પછી તેની ઉપર સીધી ટાઇલ ન લગાવો.
2. टाइल के पीछे पर्याप्त एडहेसिव संपर्क न होना
यदि टाइल के पीछे और एडहेसिव के बीच पर्याप्त संपर्क नहीं बनता, तो बॉन्डिंग कमजोर हो सकती है। गलत ट्रॉवेल, गलत लगाने की विधि या टाइल को ठीक से न दबाने के कारण ऐसा हो सकता है।
समाधान:
- सही नॉच वाली ट्रॉवेल का इस्तेमाल करें।
- एडहेसिव को एक ही दिशा में फैलाएँ।
- टाइल को सही तरीके से दबाकर लगाएँ।
- बड़ी टाइलों के लिए आवश्यकता होने पर टाइल के पीछे भी एडहेसिव लगाएँ।
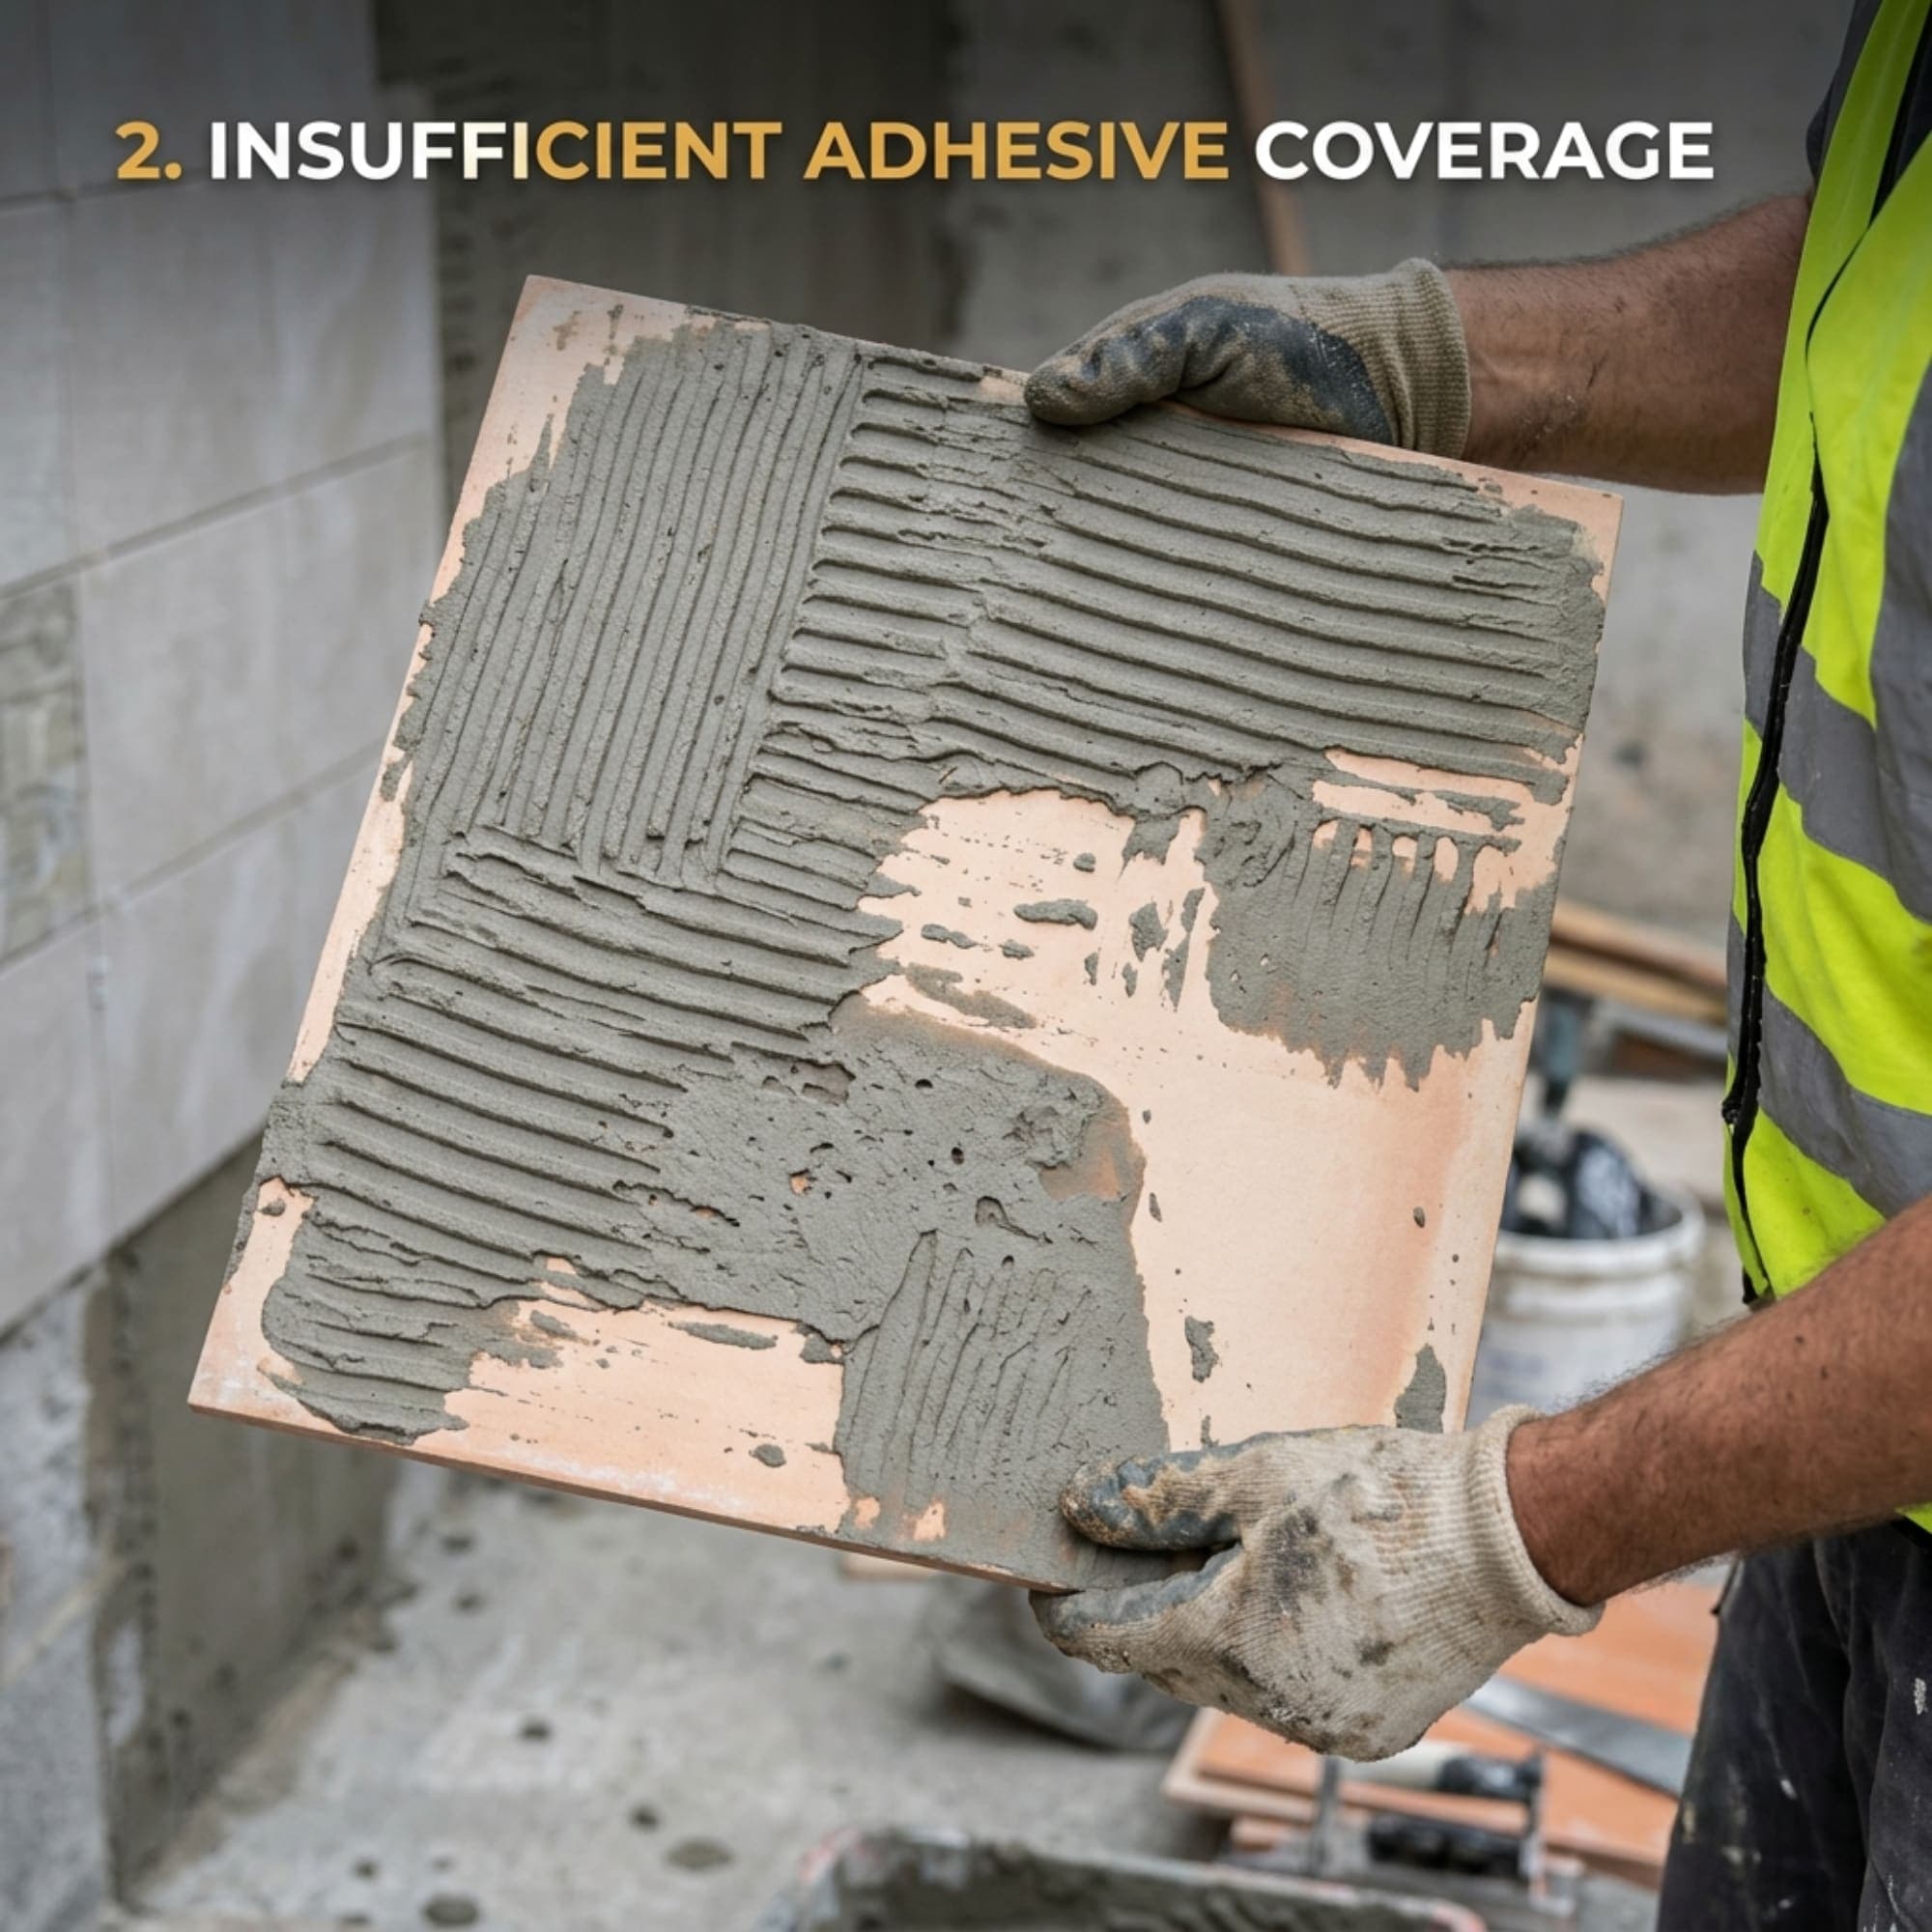
Insufficient Adhesive Coverage Behind the Tile
For a strong bond, the adhesive must make adequate contact with the back of the tile and the installation surface.
If the adhesive is applied unevenly, the wrong trowel is used, or the tile is not pressed and moved properly into the adhesive, empty spaces may remain behind the tile. These gaps can reduce bonding strength and may contribute to tile failure.
Solution:
- Use the recommended notched trowel.
- Spread the adhesive in straight, parallel ridges.
- Press and move the tile as recommended to collapse the ridges.
- Check a few freshly installed tiles by lifting them to inspect adhesive coverage.
- Use the back-buttering method when required, especially for large-format tiles or where specified by the installation guidelines.
ટાઇલની પાછળ પૂરતો એડહેસિવ સંપર્ક ન થવો
ટાઇલની પાછળ અને એડહેસિવ વચ્ચે પૂરતો સંપર્ક ન બને, તો બોન્ડિંગ નબળું પડી શકે છે. ખોટી ટ્રોવેલ, ખોટી લગાવવાની રીત અથવા ટાઇલને યોગ્ય રીતે ન દબાવવાને કારણે આવું થઈ શકે છે.
ઉકેલ:
- યોગ્ય નોચવાળી ટ્રોવેલનો ઉપયોગ કરો.
- એડહેસિવને એક જ દિશામાં ફેલાવો.
- ટાઇલને યોગ્ય રીતે દબાવીને બેસાડો.
મોટી ટાઇલ માટે જરૂરી હોય ત્યારે ટાઇલની પાછળ પણ એડહેસિવ લગાવો.
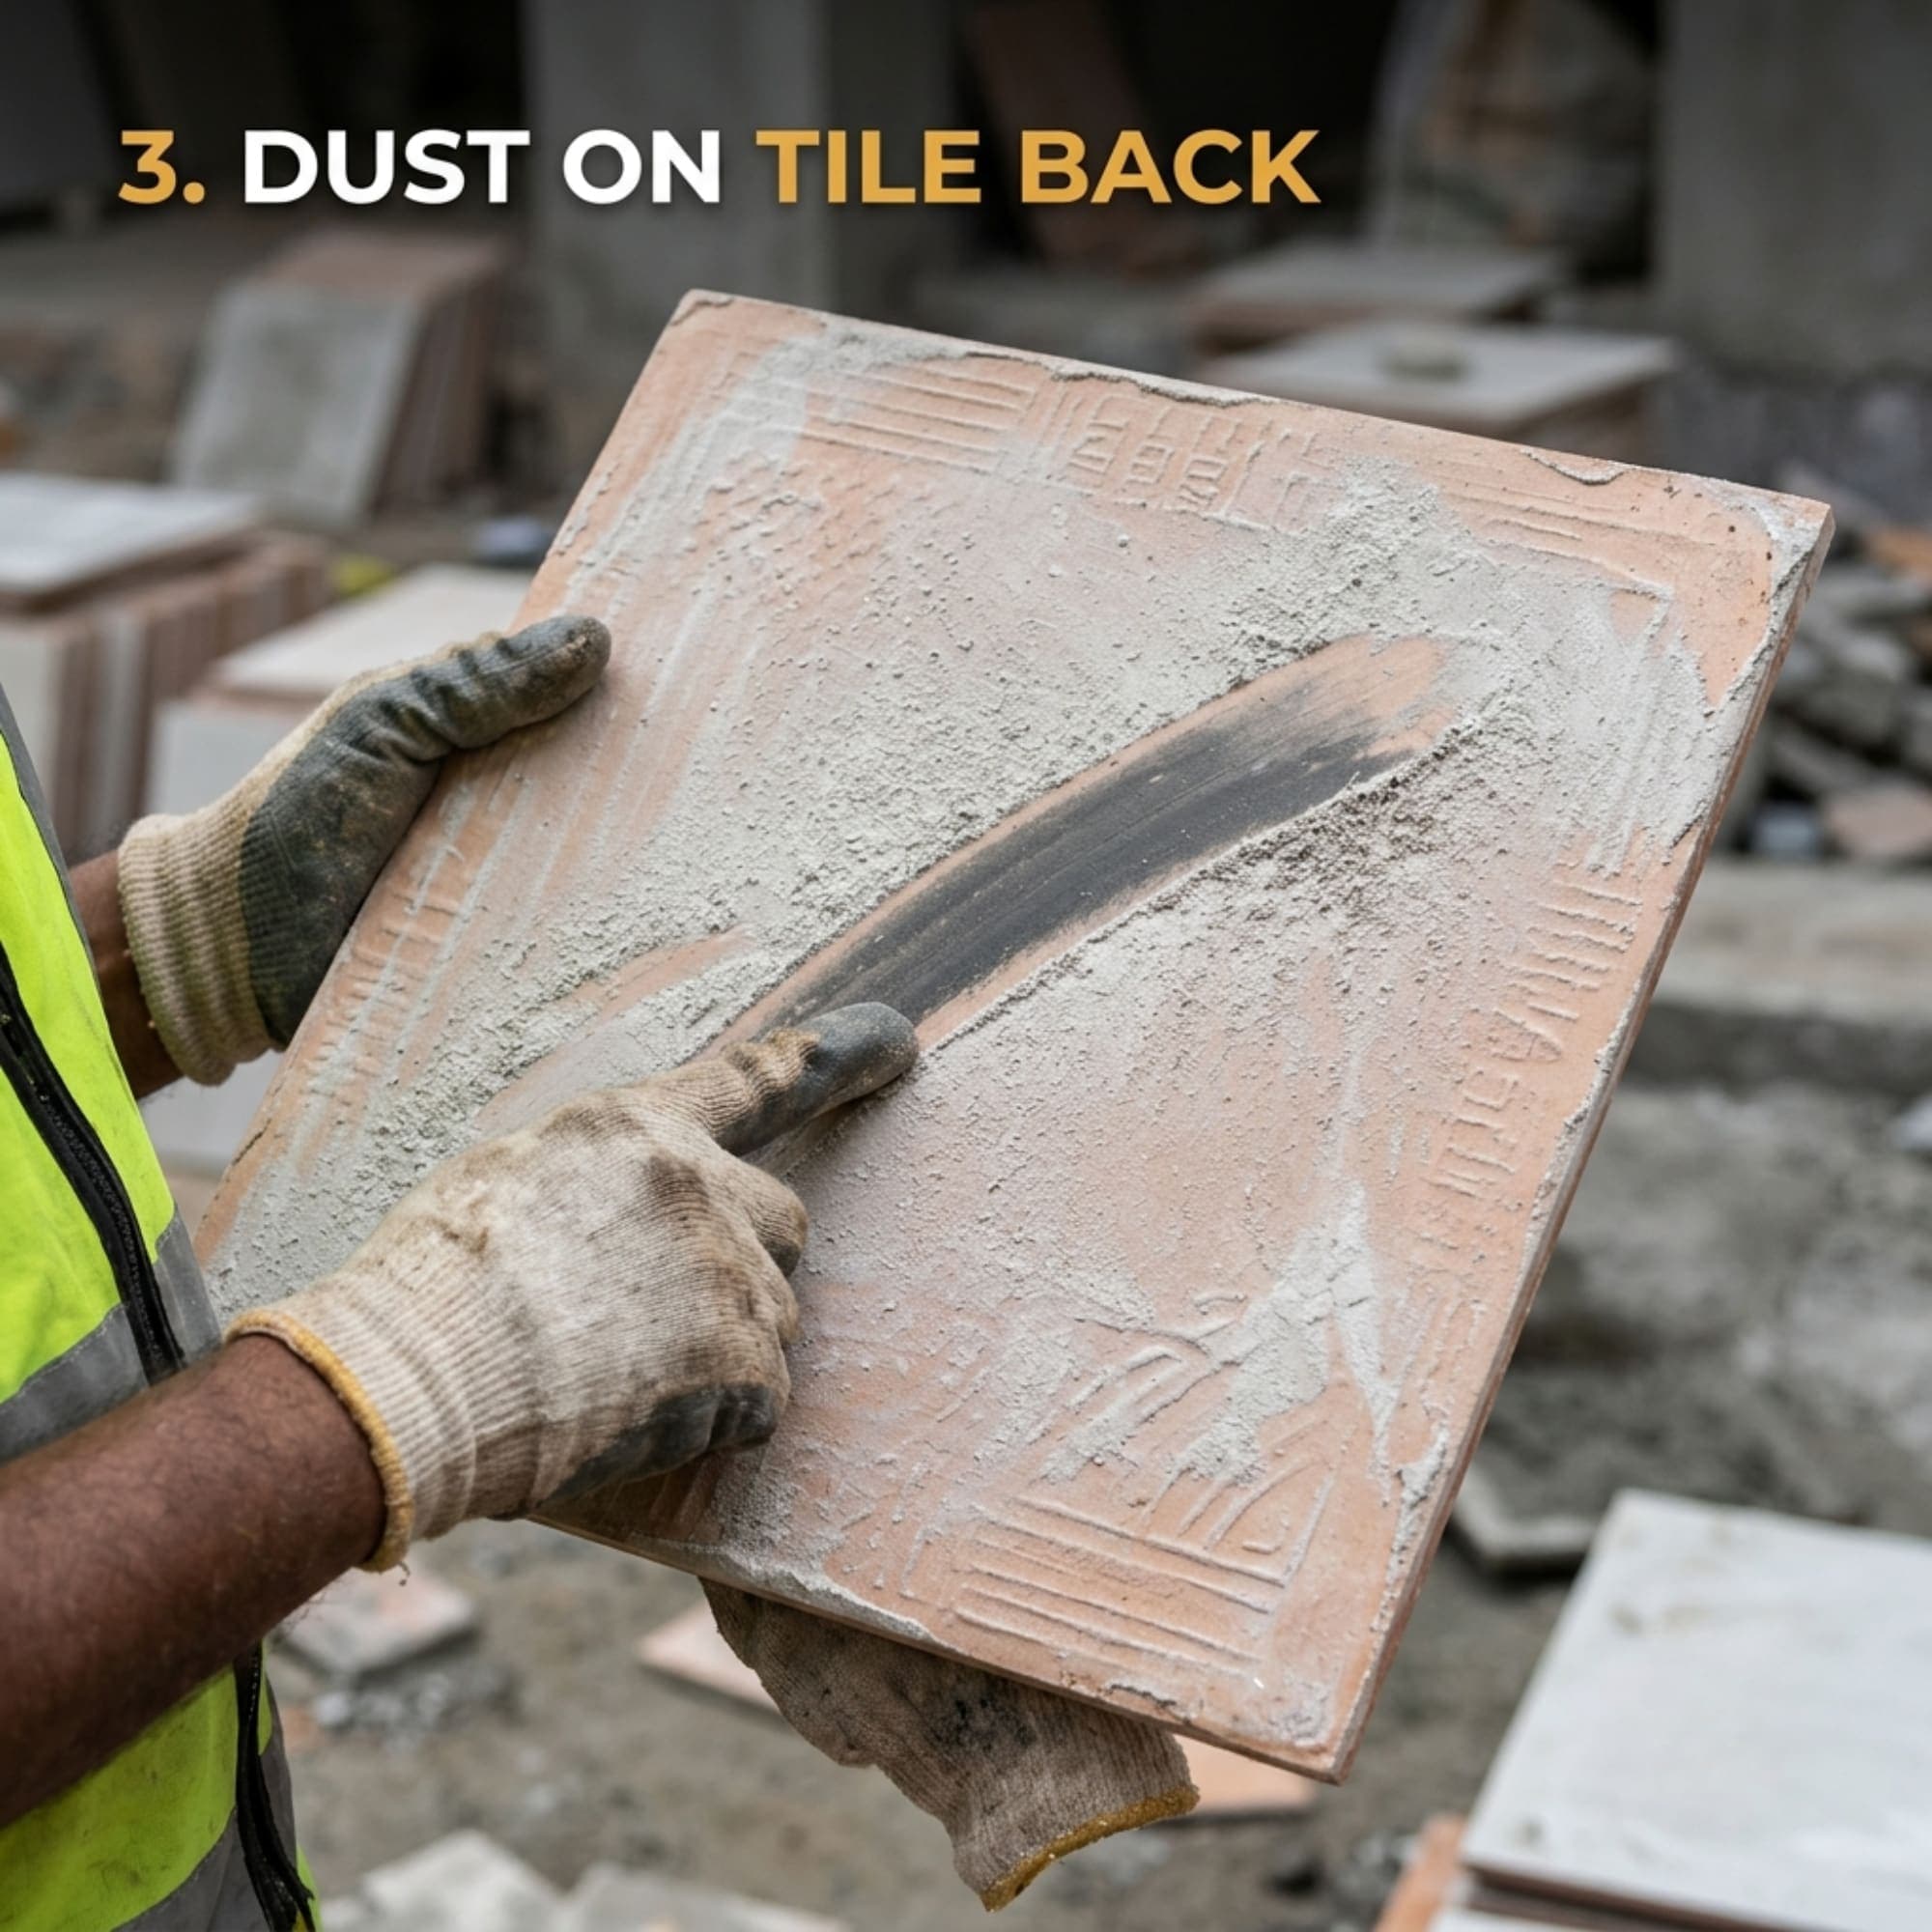
3. टाइल के पीछे धूल या कोटिंग होना
टाइल के पीछे धूल, पाउडर या निर्माण के दौरान बचे हुए अवशेष होने से एडहेसिव और टाइल के बीच बॉन्डिंग प्रभावित हो सकती है।
समाधान:
- टाइल लगाने से पहले उसके पिछले हिस्से की जाँच करें।
- निर्माता के निर्देशों के अनुसार सफाई करें।
- यदि टाइल के पीछे विशेष कोटिंग है, तो एडहेसिव के साथ उसकी अनुकूलता जाँचें।
Dust or Coating on the Back of the Tile
Dust, powder, manufacturing residue, or a weak coating on the back of a tile can interfere with the adhesive bond.
If the adhesive bonds to dust rather than to the tile surface itself, the connection may remain weak. Some tiles may also have a surface treatment that affects adhesion.
Solution:
- Inspect the back of the tiles before installation.
- Remove loose dust and powder using a suitable cleaning method.
- Ensure the tile is clean and suitable for the selected adhesive.
- Follow the tile manufacturer's recommendations for special back-surface treatments.
ટાઇલના પાછળના ભાગમાં ધૂળ અથવા કોટિંગ હોવું
ટાઇલના પાછળના ભાગમાં ધૂળ, પાવડર અથવા ઉત્પાદન દરમિયાન રહેલા અવશેષો હોય, તો એડહેસિવ અને ટાઇલ વચ્ચેનું બોન્ડિંગ અસરગ્રસ્ત થઈ શકે છે.
ઉકેલ:
- ટાઇલ લગાવતાં પહેલાં તેના પાછળના ભાગની તપાસ કરો.
- ઉત્પાદકની સૂચના મુજબ યોગ્ય સફાઈ કરો.
- જો ટાઇલની પાછળ ખાસ કોટિંગ હોય, તો એડહેસિવ સાથે તેની સુસંગતતા તપાસો.
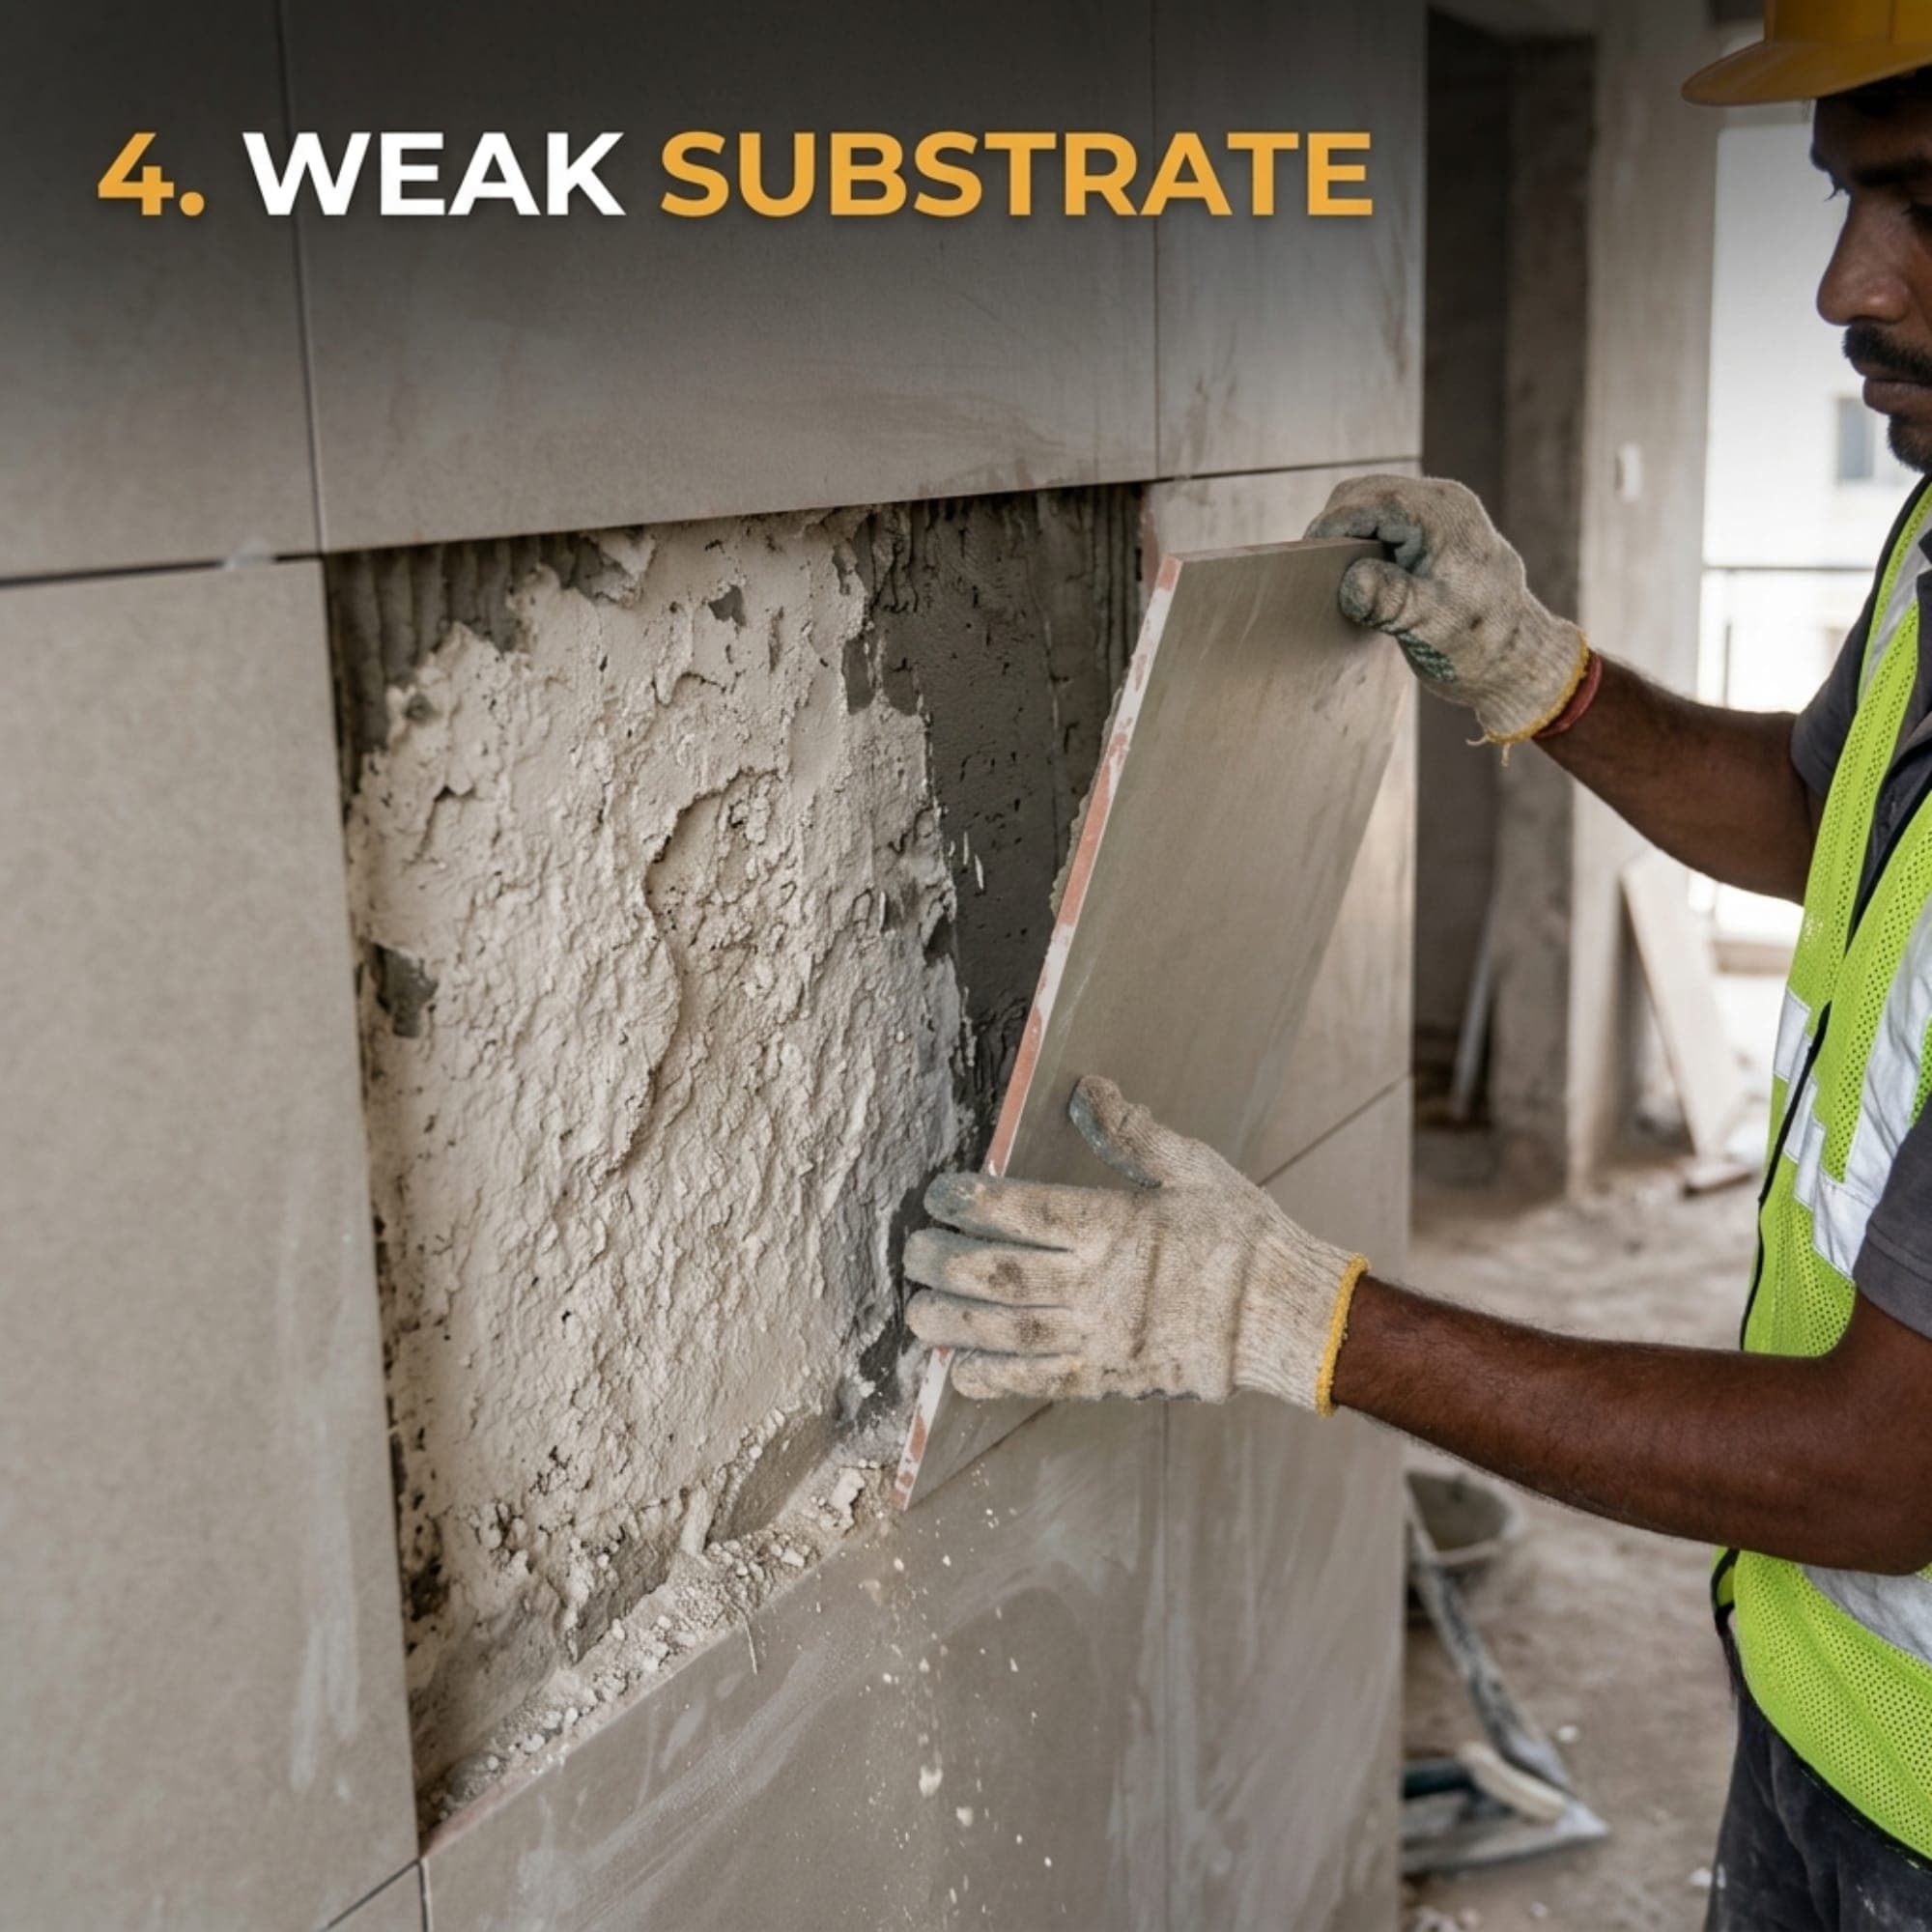
4. दीवार की सतह कमजोर या धूल वाली होना
यदि दीवार पर ढीली धूल, कमजोर प्लास्टर या सीमेंट की कमजोर परत है, तो एडहेसिव मजबूत सतह के साथ सही बॉन्ड नहीं बना पाएगा।
समाधान:
- टाइल लगाने से पहले दीवार की मजबूती जाँचें।
- कमजोर परत को हटा दें।
- साफ, मजबूत और सही तरीके से तैयार की गई सतह पर ही टाइल लगाएँ।
Weak or Dusty Wall and Floor Surfaces
Tile adhesive can only perform properly when the underlying surface is sufficiently strong and stable.
If the plaster, screed, or concrete surface is weak, powdery, cracked, or covered with dust, the adhesive may bond firmly to the surface layer while that weak layer separates from the wall or floor.
In such cases, the tile may come off along with a layer of plaster or surface material.
Solution:
- Check the strength and stability of the substrate before tiling.
- Remove loose material, dust, and weak surface layers.
- Repair damaged areas using suitable materials.
- Allow the substrate to reach the required condition before applying adhesive.
દિવાલની સપાટી નબળી અથવા ધૂળવાળી હોવી
જો દિવાલ પર છૂટતી ધૂળ, નબળું પ્લાસ્ટર અથવા સિમેન્ટનો નબળો પડ હોય, તો એડહેસિવ મજબૂત સપાટી સાથે યોગ્ય બોન્ડ બનાવી શકતું નથી.
ઉકેલ:
- ટાઇલ લગાવતાં પહેલાં દિવાલની મજબૂતી તપાસો.
- નબળા પડને દૂર કરો.
સ્વચ્છ, મજબૂત અને યોગ્ય રીતે તૈયાર કરેલી સપાટી પર જ ટાઇલ લગાવો.
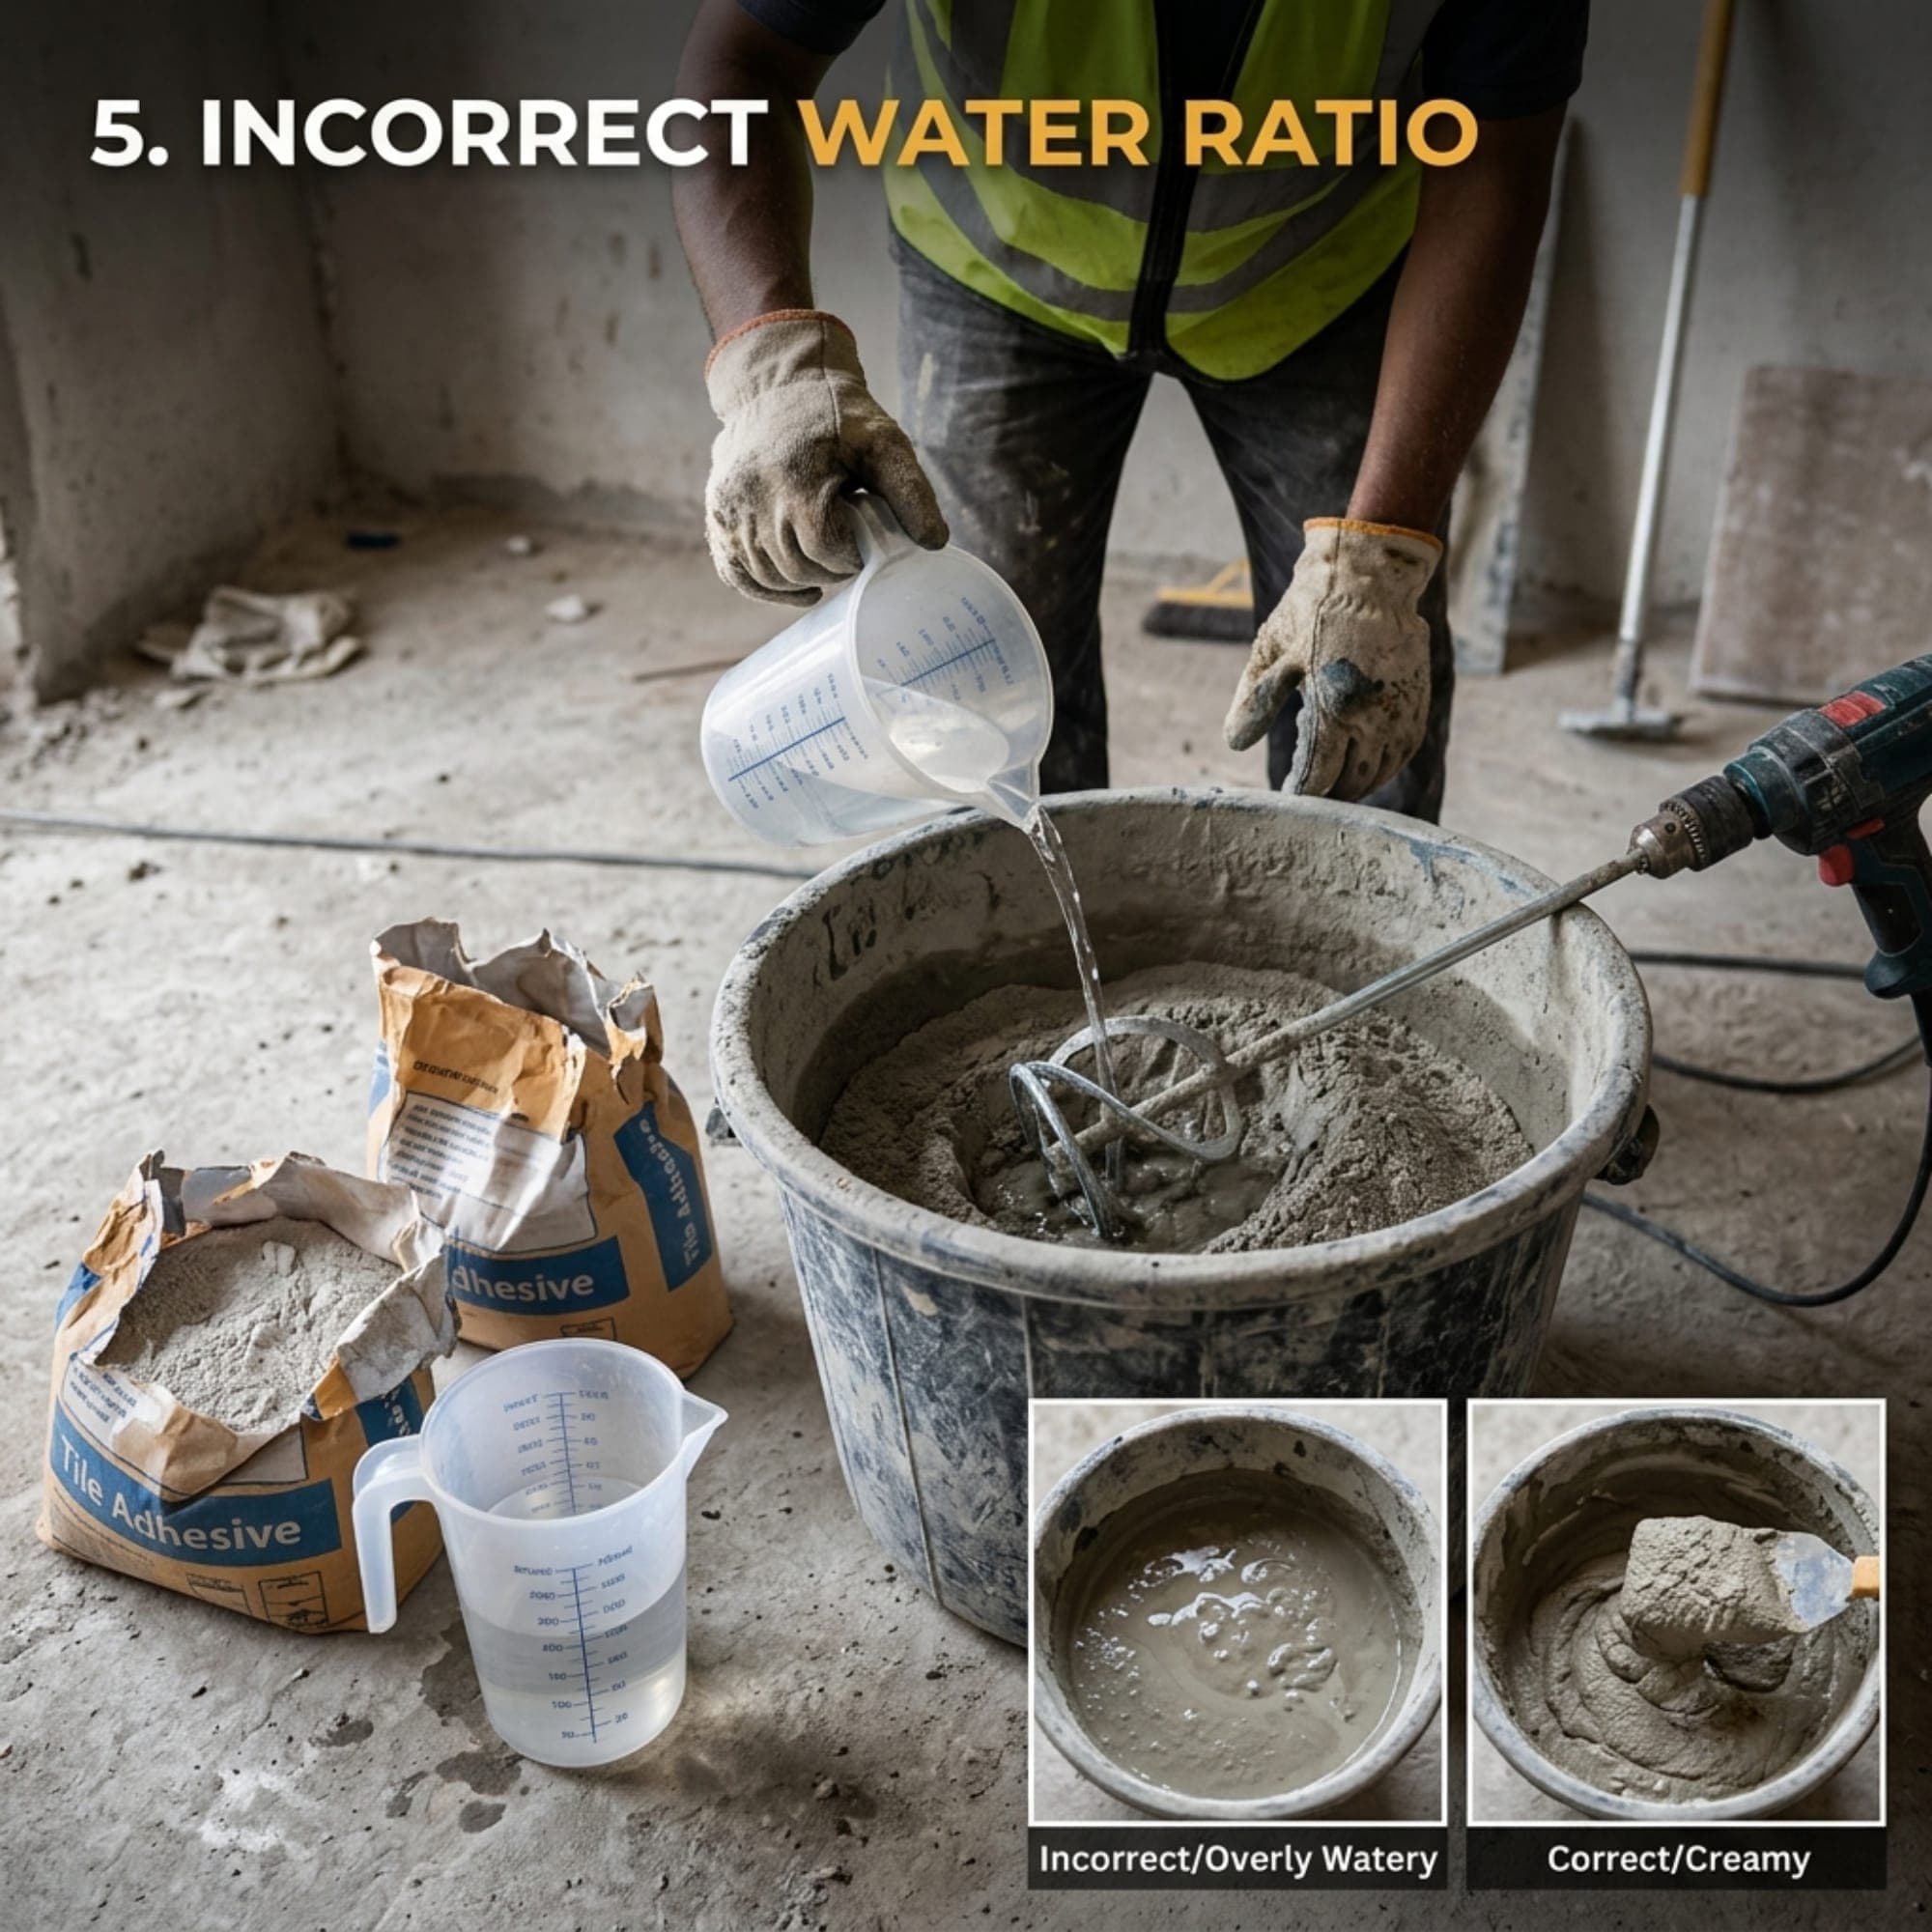
5. पानी की मात्रा गलत होना
टाइल एडहेसिव में निर्धारित मात्रा से अधिक या कम पानी डालने से उसकी कार्यक्षमता और अंतिम बॉन्डिंग प्रभावित हो सकती है।
अधिक पानी डालने से मिश्रण के गुण बदल सकते हैं, जबकि बहुत कम पानी होने पर सही मिक्सिंग और लगाने में परेशानी हो सकती है।
समाधान:
- पैकिंग या Technical Data Sheet में बताई गई मात्रा के अनुसार ही पानी मिलाएँ।
- अंदाज़े से पानी डालने से बचें।
- हर बैच में मिक्सिंग की प्रक्रिया एक जैसी रखें।
Incorrect Water-to-Adhesive Ratio
Tile adhesive is formulated to work with a specific amount of water. Adding too much or too little water can affect its consistency, workability, bonding performance, and final strength.
Excess water may weaken the hardened material, while insufficient water may make the adhesive difficult to mix and apply properly.
Solution:
- Follow the water quantity stated on the product packaging or technical data sheet.
- Measure water accurately instead of estimating it.
- Do not add extra water to adhesive that has started to set.
- Never assume that a thinner mixture will automatically provide better bonding.
પાણીનું પ્રમાણ ખોટું હોવું
ટાઇલ એડહેસિવમાં સૂચિત પ્રમાણ કરતાં વધારે કે ઓછું પાણી નાખવાથી તેની કાર્યક્ષમતા અને અંતિમ બોન્ડિંગ અસરગ્રસ્ત થઈ શકે છે.
વધારે પાણી નાખવાથી મિશ્રણના ગુણધર્મો બદલાઈ શકે છે, જ્યારે ખૂબ ઓછું પાણી યોગ્ય મિક્સિંગ અને એપ્લિકેશનમાં મુશ્કેલી ઊભી કરી શકે છે.
ઉકેલ:
- પેકિંગ અથવા ટેક્નિકલ ડેટા શીટમાં દર્શાવેલા પાણીના પ્રમાણ મુજબ જ મિશ્રણ તૈયાર કરો.
- અંદાજથી પાણી ઉમેરવાનું ટાળો.
- દરેક બેચમાં શક્ય તેટલું એકસરખું મિક્સિંગ રાખો.
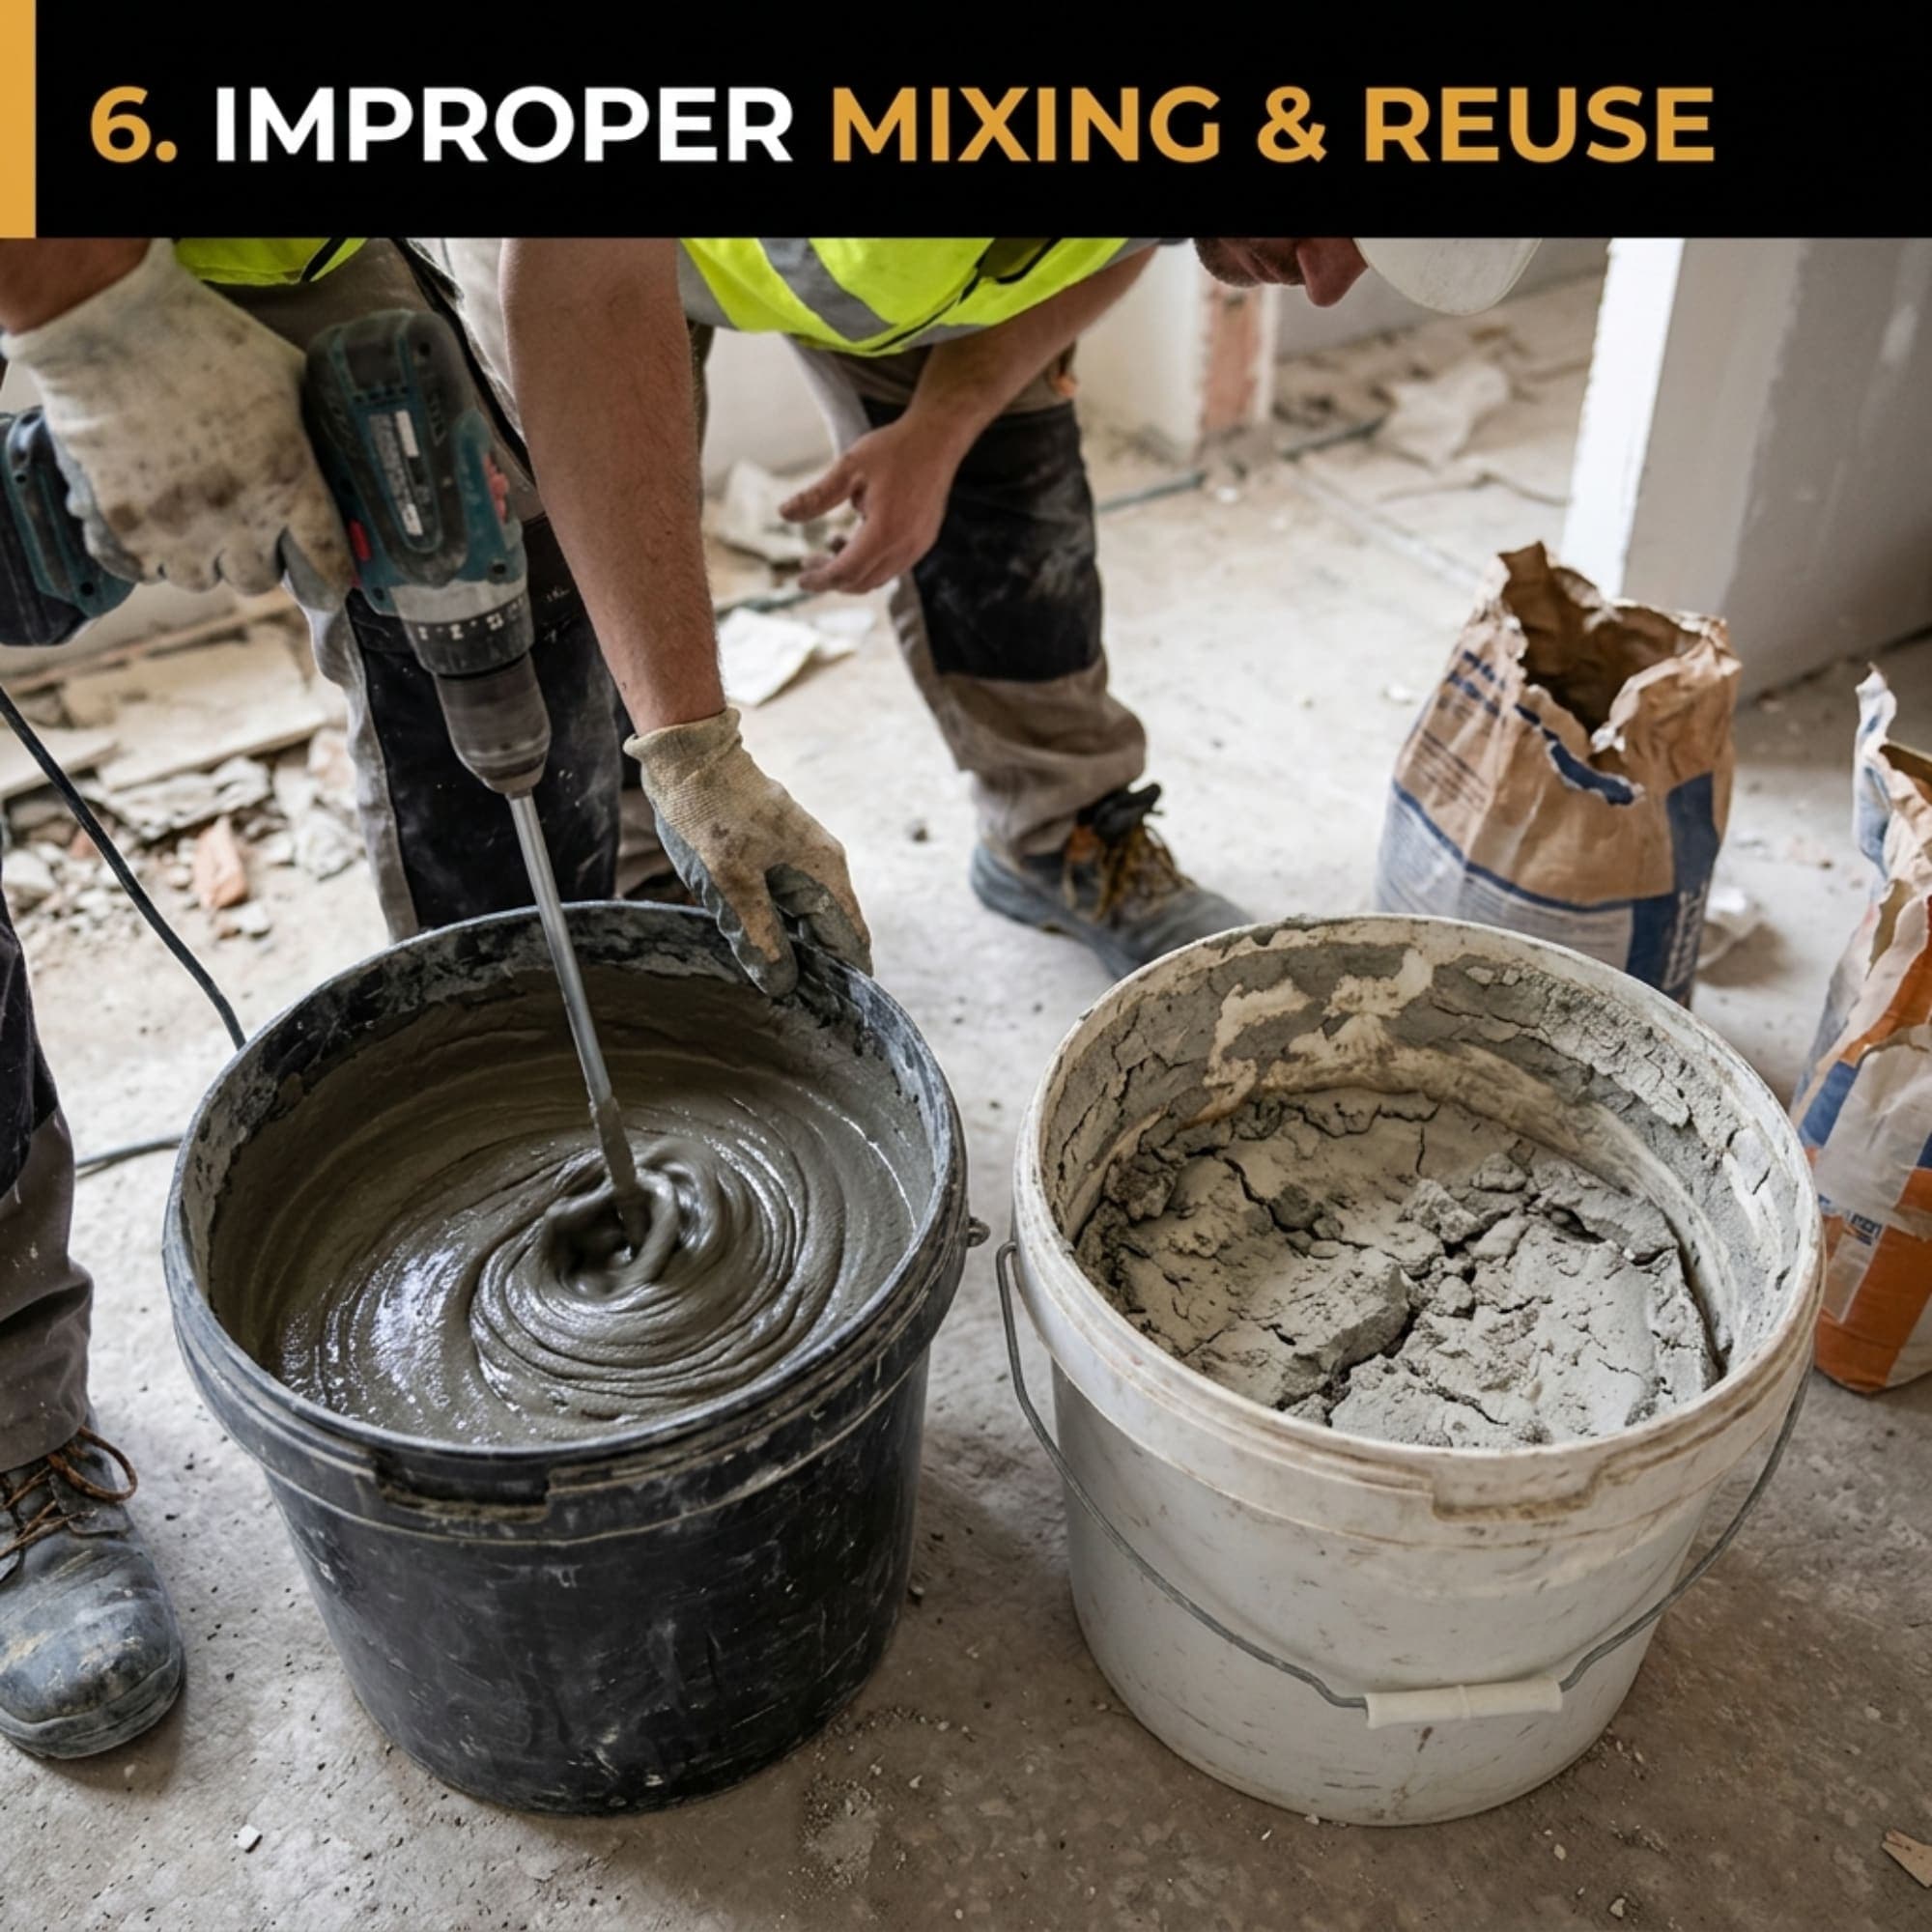
6. गलत मिक्सिंग या लंबे समय बाद एडहेसिव का इस्तेमाल करना
एडहेसिव को सही तरीके से मिक्स न करना, निर्धारित Rest Time न देना या मिश्रण के उपयोग के लिए उपयुक्त समय समाप्त होने के बाद इस्तेमाल करना, बॉन्डिंग की समस्या का कारण बन सकता है।
समाधान:
- निर्धारित मिक्सिंग विधि और Rest Time का पालन करें।
- मिश्रण को केवल उपयोग योग्य समय के भीतर इस्तेमाल करें।
- मिश्रण सेट होने लगे, तो उसमें दोबारा पानी मिलाकर इस्तेमाल न करें।
Improper Mixing, Resting Time, or Reuse of Old Mixture
Tile adhesive needs to be mixed properly to distribute its ingredients evenly.
Some products also require a resting period after the initial mixing, followed by remixing. Skipping these steps may affect workability and performance.
Using adhesive after its pot life has expired can also cause bonding problems. Adding more water to restore the workability of an old mixture is not an appropriate solution.
Solution:
- Follow the manufacturer's mixing instructions.
- Use a suitable mechanical mixer where recommended.
- Observe the specified resting time and remixing procedure.
- Prepare manageable quantities of adhesive.
- Discard material that has exceeded its pot life.
ખોટું મિક્સિંગ અથવા લાંબા સમય પછી એડહેસિવનો ઉપયોગ
એડહેસિવ યોગ્ય રીતે મિક્સ ન કરવું, સૂચિત Rest Time ન આપવો અથવા મિશ્રણ ઉપયોગ માટે યોગ્ય ન રહે ત્યાર પછી તેનો ઉપયોગ કરવો, બોન્ડિંગની સમસ્યાનું કારણ બની શકે છે.
ઉકેલ:
- નિર્ધારિત મિક્સિંગ પદ્ધતિ અને Rest Time અનુસરો.
- મિશ્રણ ઉપયોગ માટે યોગ્ય રહે ત્યાં સુધી જ વાપરો.
- મિશ્રણ સેટ થવા લાગે પછી તેમાં ફરી પાણી ઉમેરીને વાપરવાનું ટાળો.
**
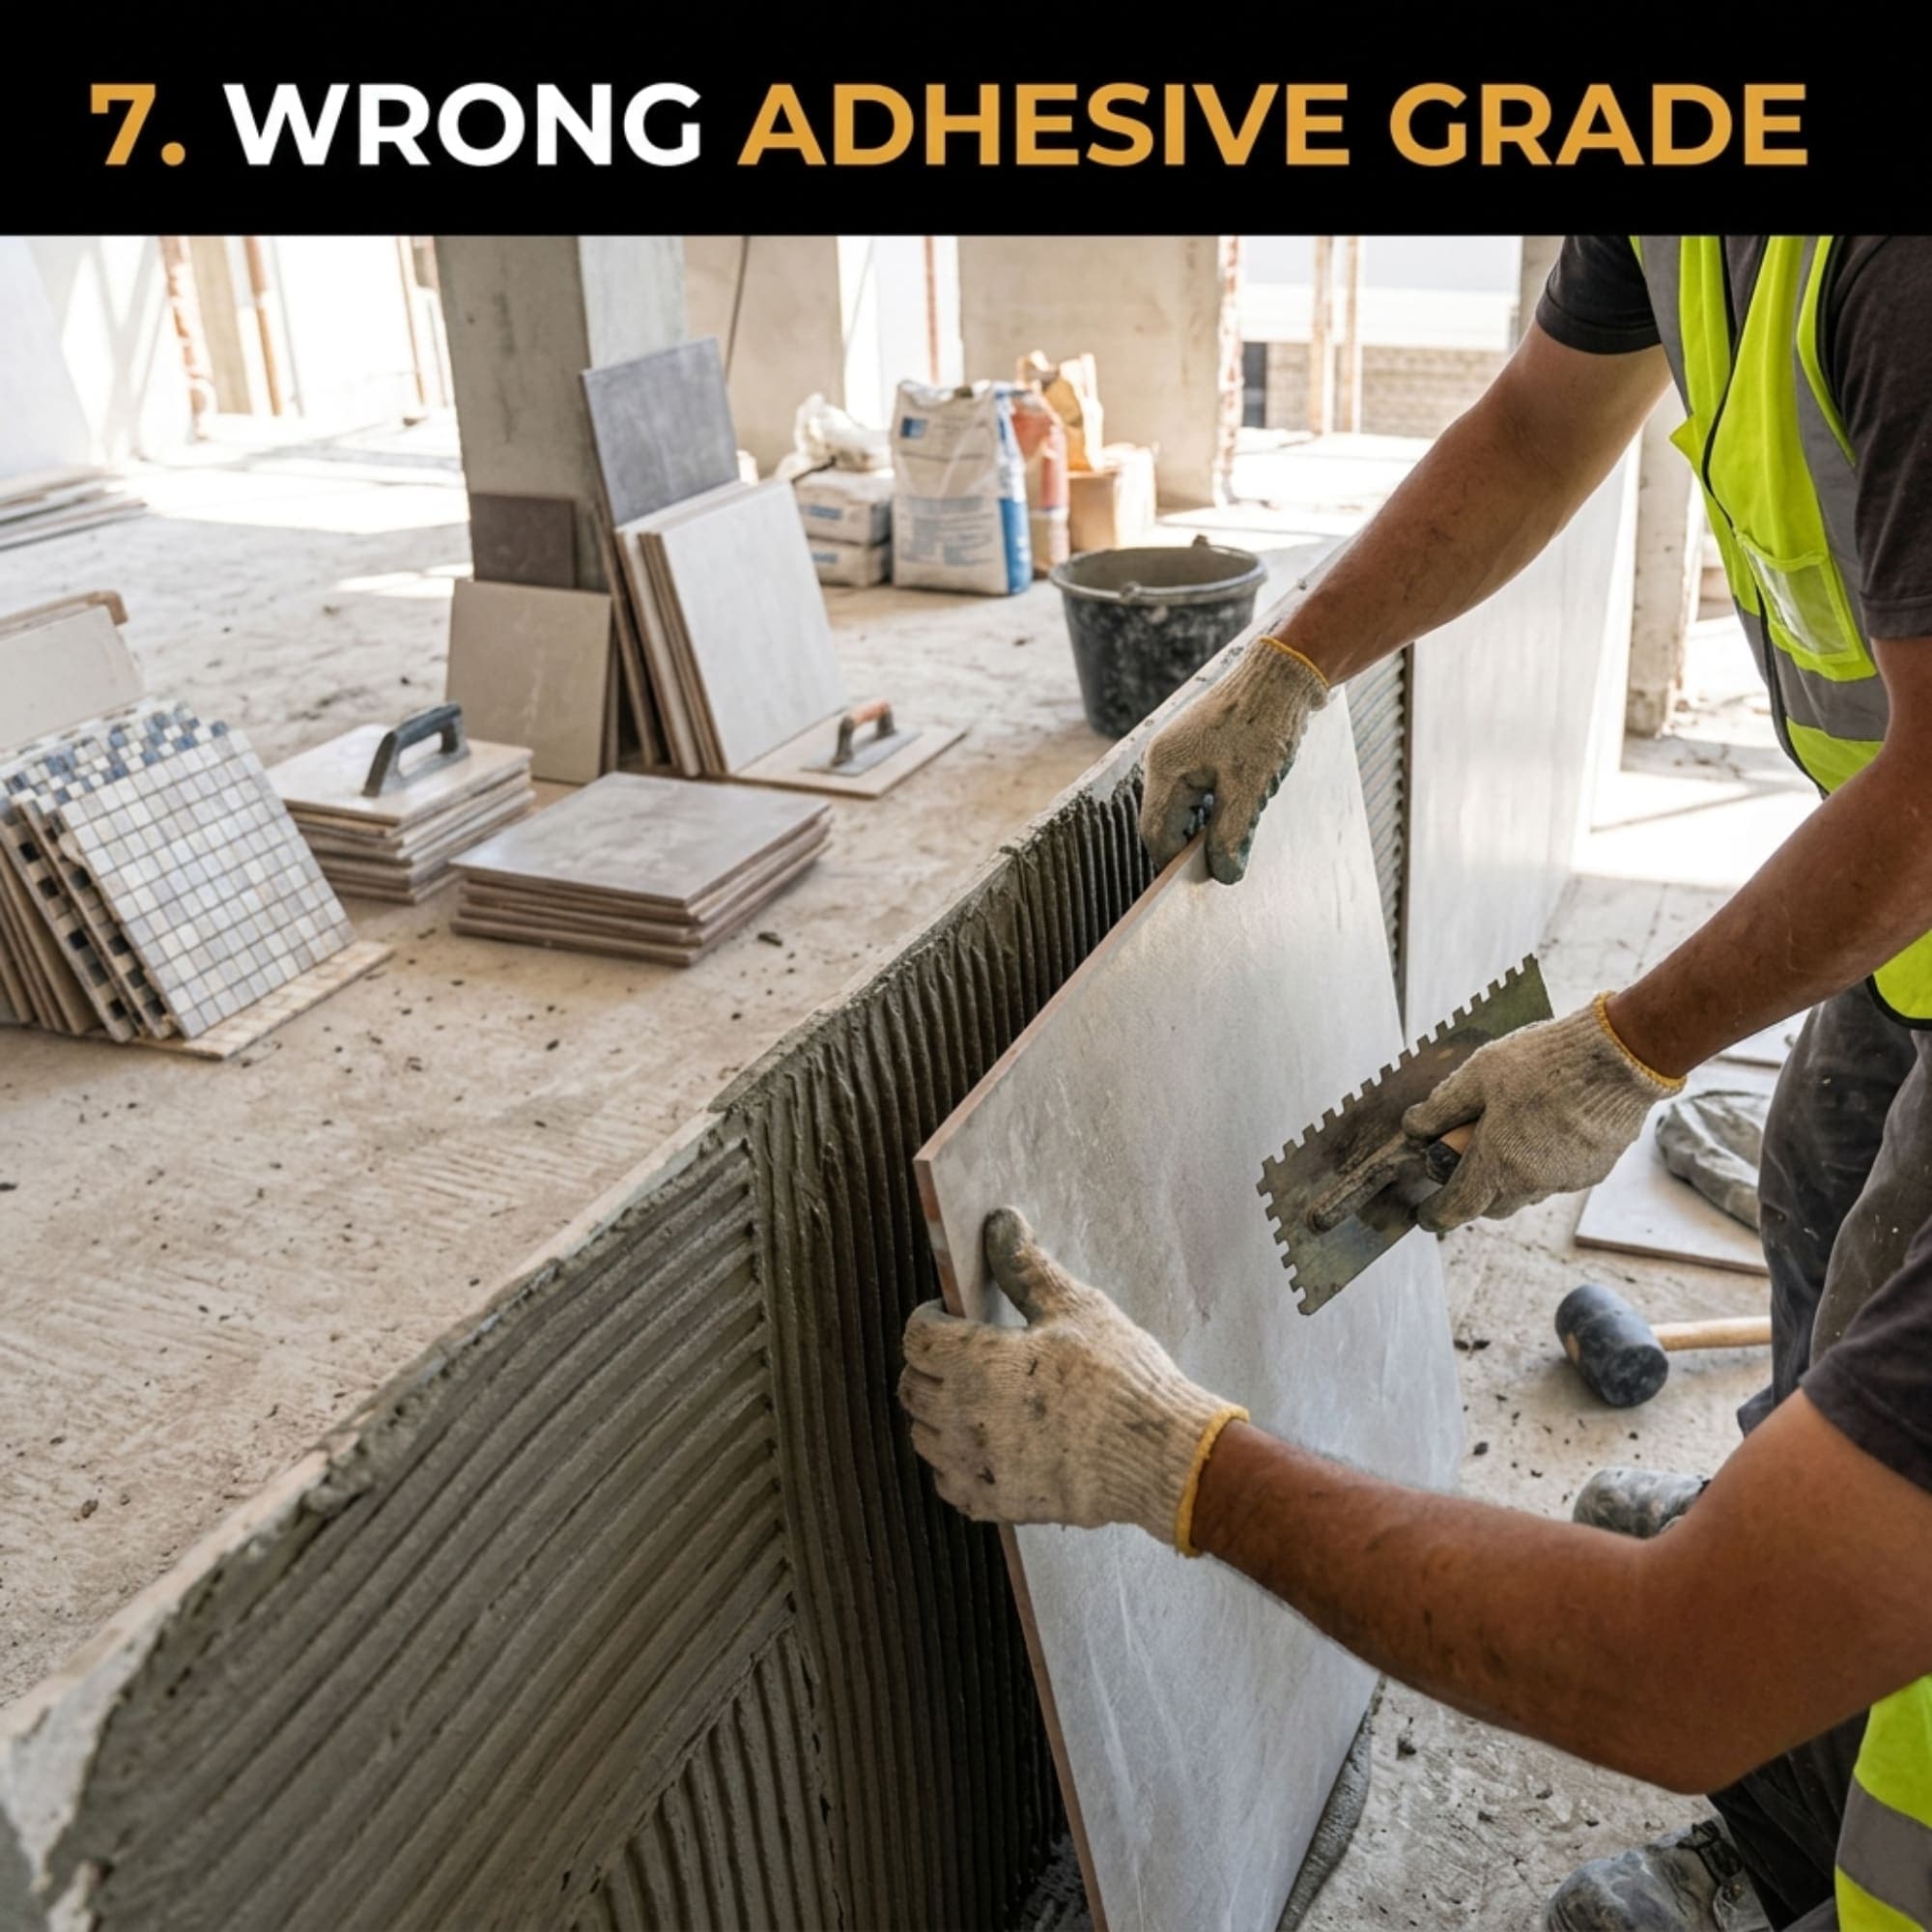
7. टाइल के लिए सही एडहेसिव ग्रेड का चयन न करना
हर प्रकार की टाइल और हर सतह के लिए एक ही ग्रेड उपयुक्त नहीं होता। टाइल का आकार, पानी सोखने की क्षमता, टाइल का प्रकार, अंदर या बाहर का उपयोग और आधार की स्थिति के अनुसार सही एडहेसिव चुनना ज़रूरी है।
समाधान:
- टाइल और उसके उपयोग के अनुसार सही ग्रेड चुनें।
- टाइल निर्माता और एडहेसिव की Technical Data Sheet के निर्देशों का पालन करें।
- आवश्यकता होने पर साइट पर उचित ट्रायल करें।
Using the Wrong Tile Adhesive Grade
Different tiles and installation conditions require different adhesive performance levels.
For example, a small, porous ceramic tile installed on a suitable interior wall may have different requirements from a large-format porcelain tile, a low-absorption tile, or a tile installed in an exterior or continuously wet area.
Using an adhesive that is not suitable for the tile type, substrate, or application can increase the risk of failure.
Solution:
- Select the adhesive grade according to the tile type, size, substrate, and installation location.
- Check the product's declared classification and technical data sheet.
- For large-format tiles, exterior applications, or demanding conditions, use a product specifically approved for that application.
- Do not select an adhesive based only on its price.
ટાઇલ માટે યોગ્ય એડહેસિવ ગ્રેડ પસંદ ન કરવો
દરેક પ્રકારની ટાઇલ અને દરેક સપાટી માટે એક જ ગ્રેડ યોગ્ય નથી. ટાઇલની સાઇઝ, શોષકતા, ટાઇલનો પ્રકાર, આંતરિક કે બાહ્ય ઉપયોગ અને આધારની સ્થિતિ પ્રમાણે યોગ્ય એડહેસિવ પસંદ કરવું જરૂરી છે.
ઉકેલ:
- ટાઇલ અને એપ્લિકેશન માટે યોગ્ય ગ્રેડ પસંદ કરો.
- ટાઇલ ઉત્પાદક અને એડહેસિવની ટેક્નિકલ સૂચનાઓ અનુસરો.
- જરૂર પડે ત્યારે સાઇટ પર યોગ્ય ટ્રાયલ કરો.
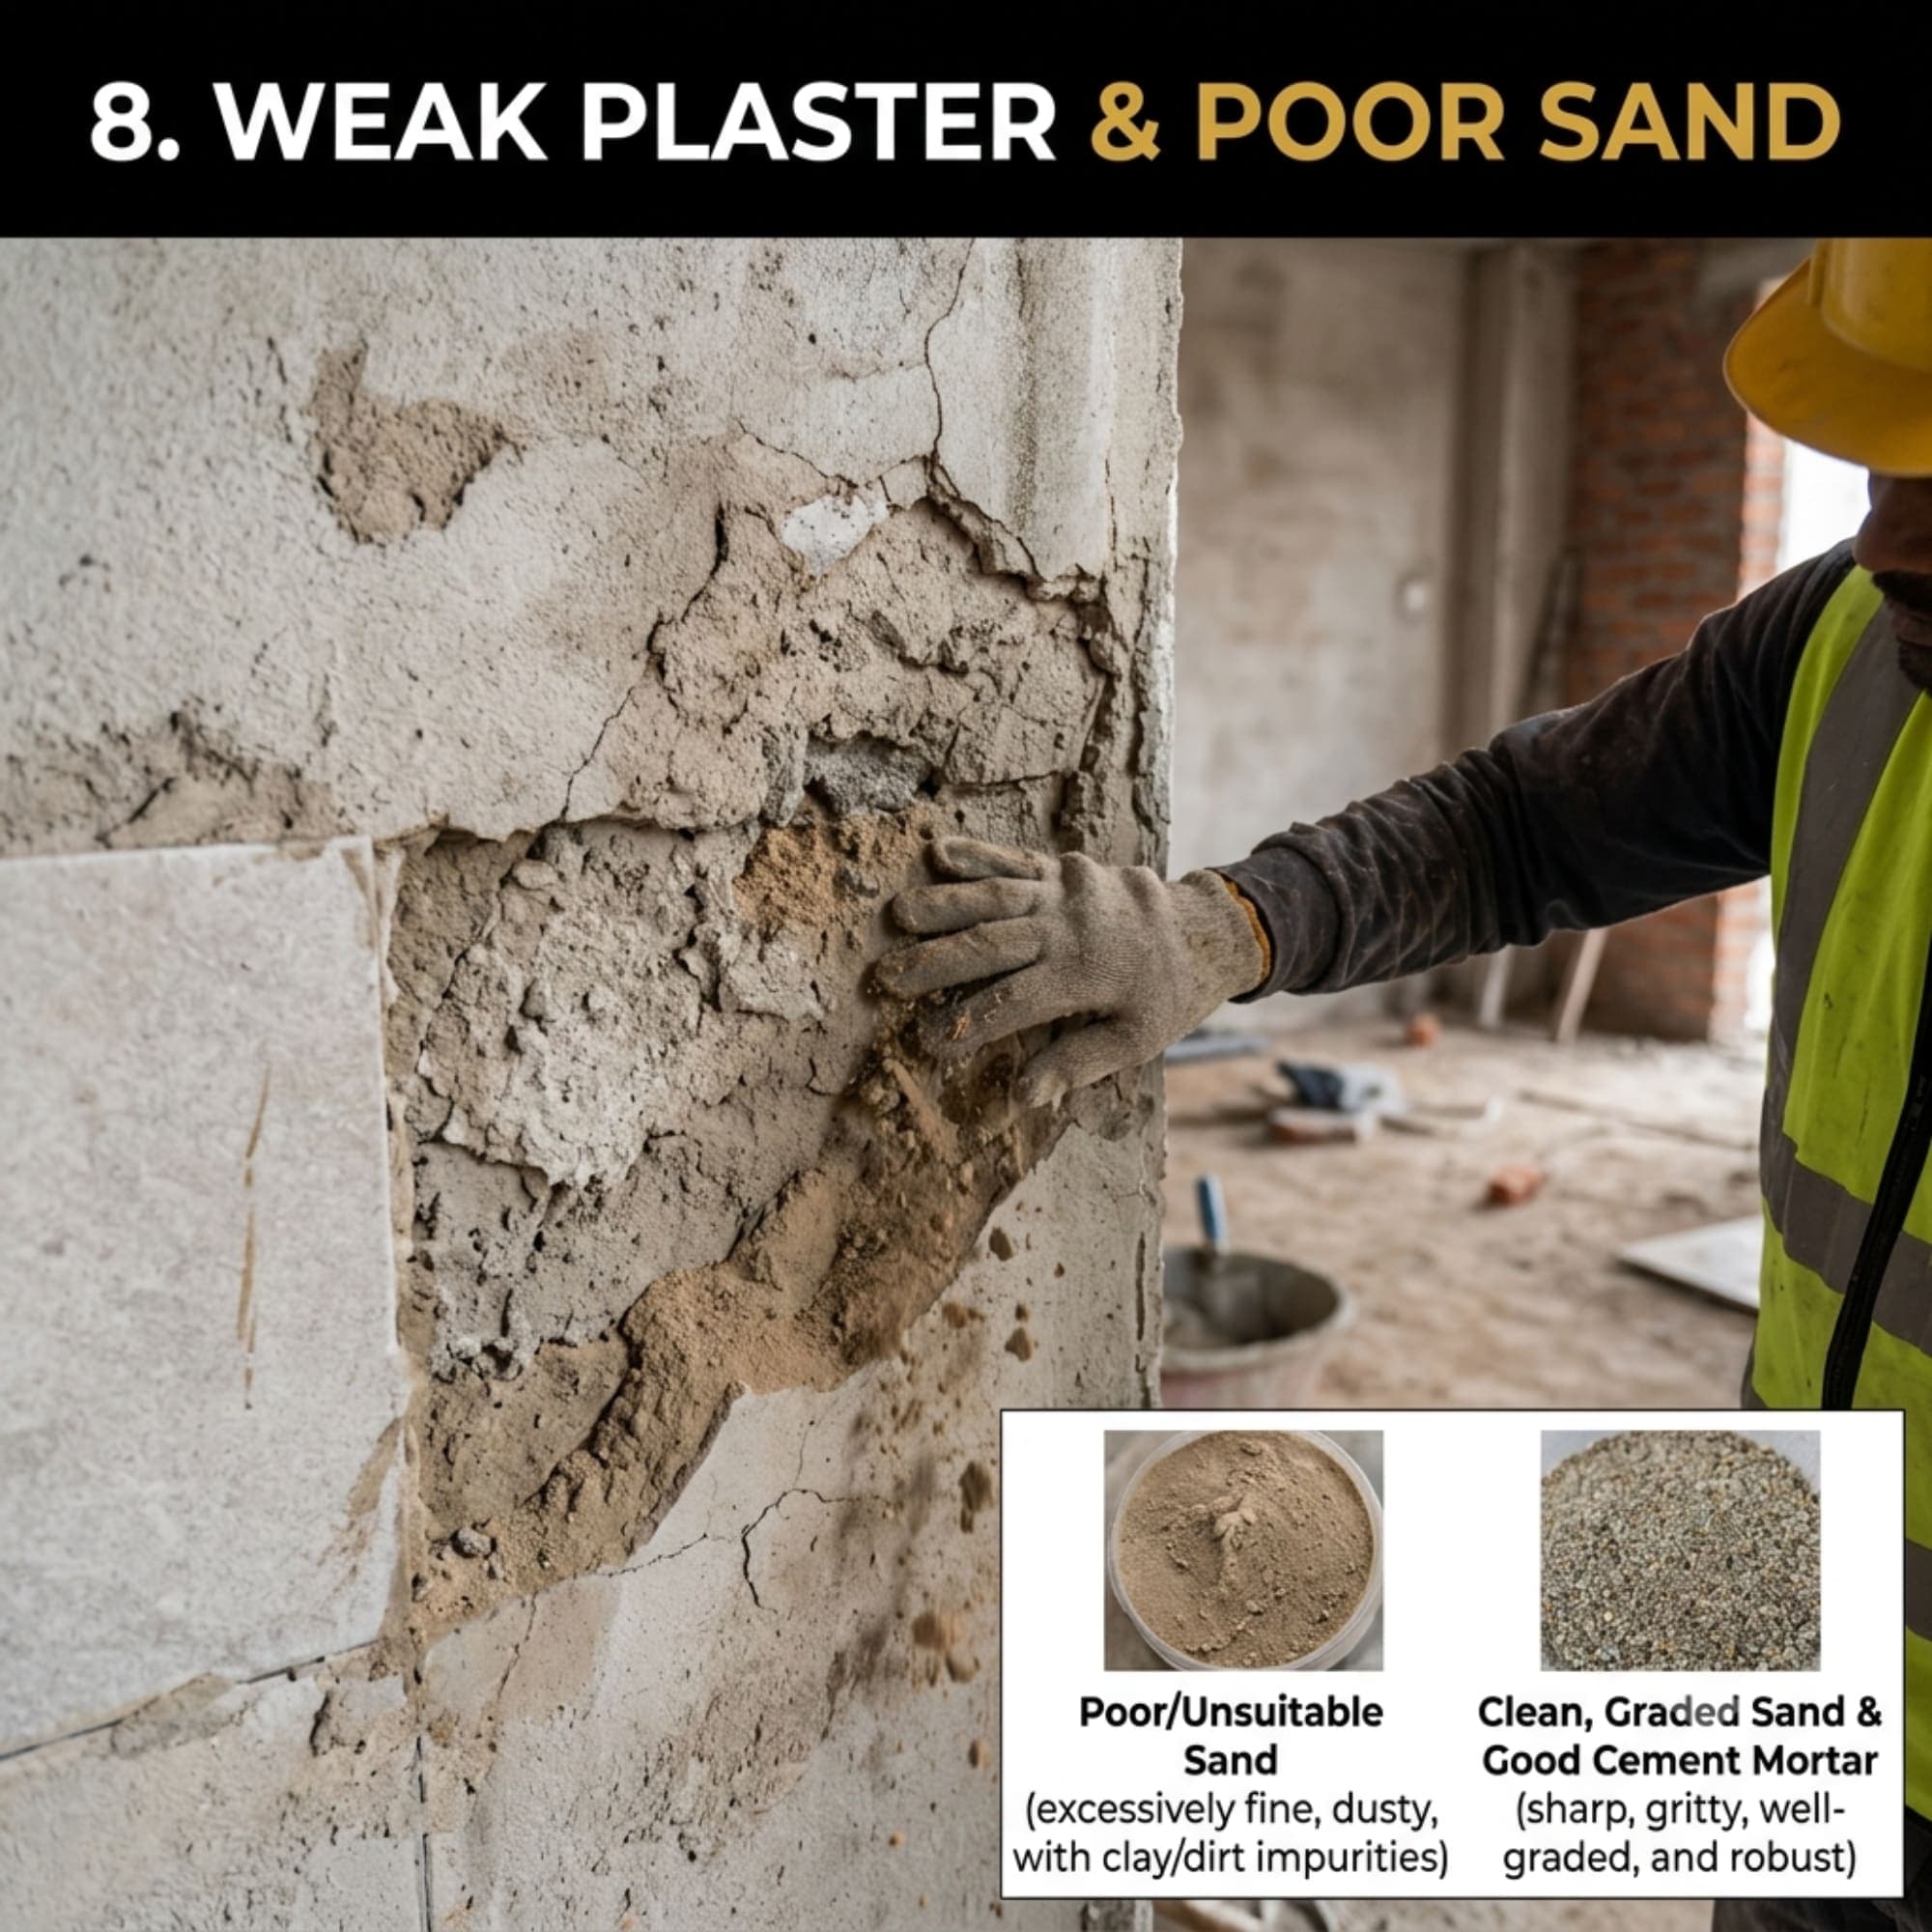
8. प्लास्टर में सीमेंट कम होना या मिट्टी वाली रेत का इस्तेमाल करना
यदि प्लास्टर में सीमेंट की मात्रा आवश्यक अनुपात से कम है या रेत में मिट्टी और सिल्ट जैसी अशुद्धियाँ अधिक हैं, तो प्लास्टर की मजबूती और बॉन्डिंग प्रभावित हो सकती है।
ऐसी स्थिति में एडहेसिव सही होने के बावजूद प्लास्टर की कमजोर परत टाइल और एडहेसिव के साथ निकल सकती है।
समाधान:
- प्लास्टर के लिए सही गुणवत्ता वाली साफ रेत का इस्तेमाल करें।
- निर्धारित डिज़ाइन के अनुसार सीमेंट की मात्रा रखें।
- टाइल लगाने से पहले प्लास्टर की मजबूती जाँचें।
- प्लास्टर कमजोर होने पर पहले उसकी उचित मरम्मत करें।
Weak Plaster Due to Poor Cement Content or Unsuitable Sand
The strength of the plaster or substrate plays an important role in tile installation.
If the plaster contains an unsuitable cement-to-sand ratio, poorly graded sand, excessive clay or mud, or other harmful impurities, it may become weak or powdery.
Even when the tile adhesive is of good quality, the tile may detach if the plaster itself cannot withstand the stresses placed on it.
Solution:
- Use suitable, clean sand and the correct plaster mix.
- Ensure proper mixing, application, and curing of the plaster.
- Allow plaster and other cement-based substrates to reach the condition required for tiling.
- Check the substrate's strength before starting the tile installation.
પ્લાસ્ટરમાં સિમેન્ટ ઓછું હોવું અથવા માટીવાળી રેતી વપરાઈ હોવી
પ્લાસ્ટરમાં સિમેન્ટનું પ્રમાણ જરૂરી કરતાં ઓછું હોય અથવા રેતીમાં માટી અને સિલ્ટ જેવી અશુદ્ધિઓ વધુ હોય, તો પ્લાસ્ટરની મજબૂતી અને બોન્ડિંગ અસરગ્રસ્ત થઈ શકે છે.
આવી સ્થિતિમાં એડહેસિવ યોગ્ય હોવા છતાં પ્લાસ્ટરનો નબળો પડ ટાઇલ અને એડહેસિવ સાથે છૂટી શકે છે.
ઉકેલ:
- પ્લાસ્ટર માટે યોગ્ય ગુણવત્તાની અને સ્વચ્છ રેતી વાપરો.
- ડિઝાઇન મુજબ સિમેન્ટનું પ્રમાણ જાળવો.
- ટાઇલ લગાવતાં પહેલાં પ્લાસ્ટરની મજબૂતી તપાસો.
પ્લાસ્ટર નબળું હોય તો પહેલાં તેની યોગ્ય મરામત કરો.
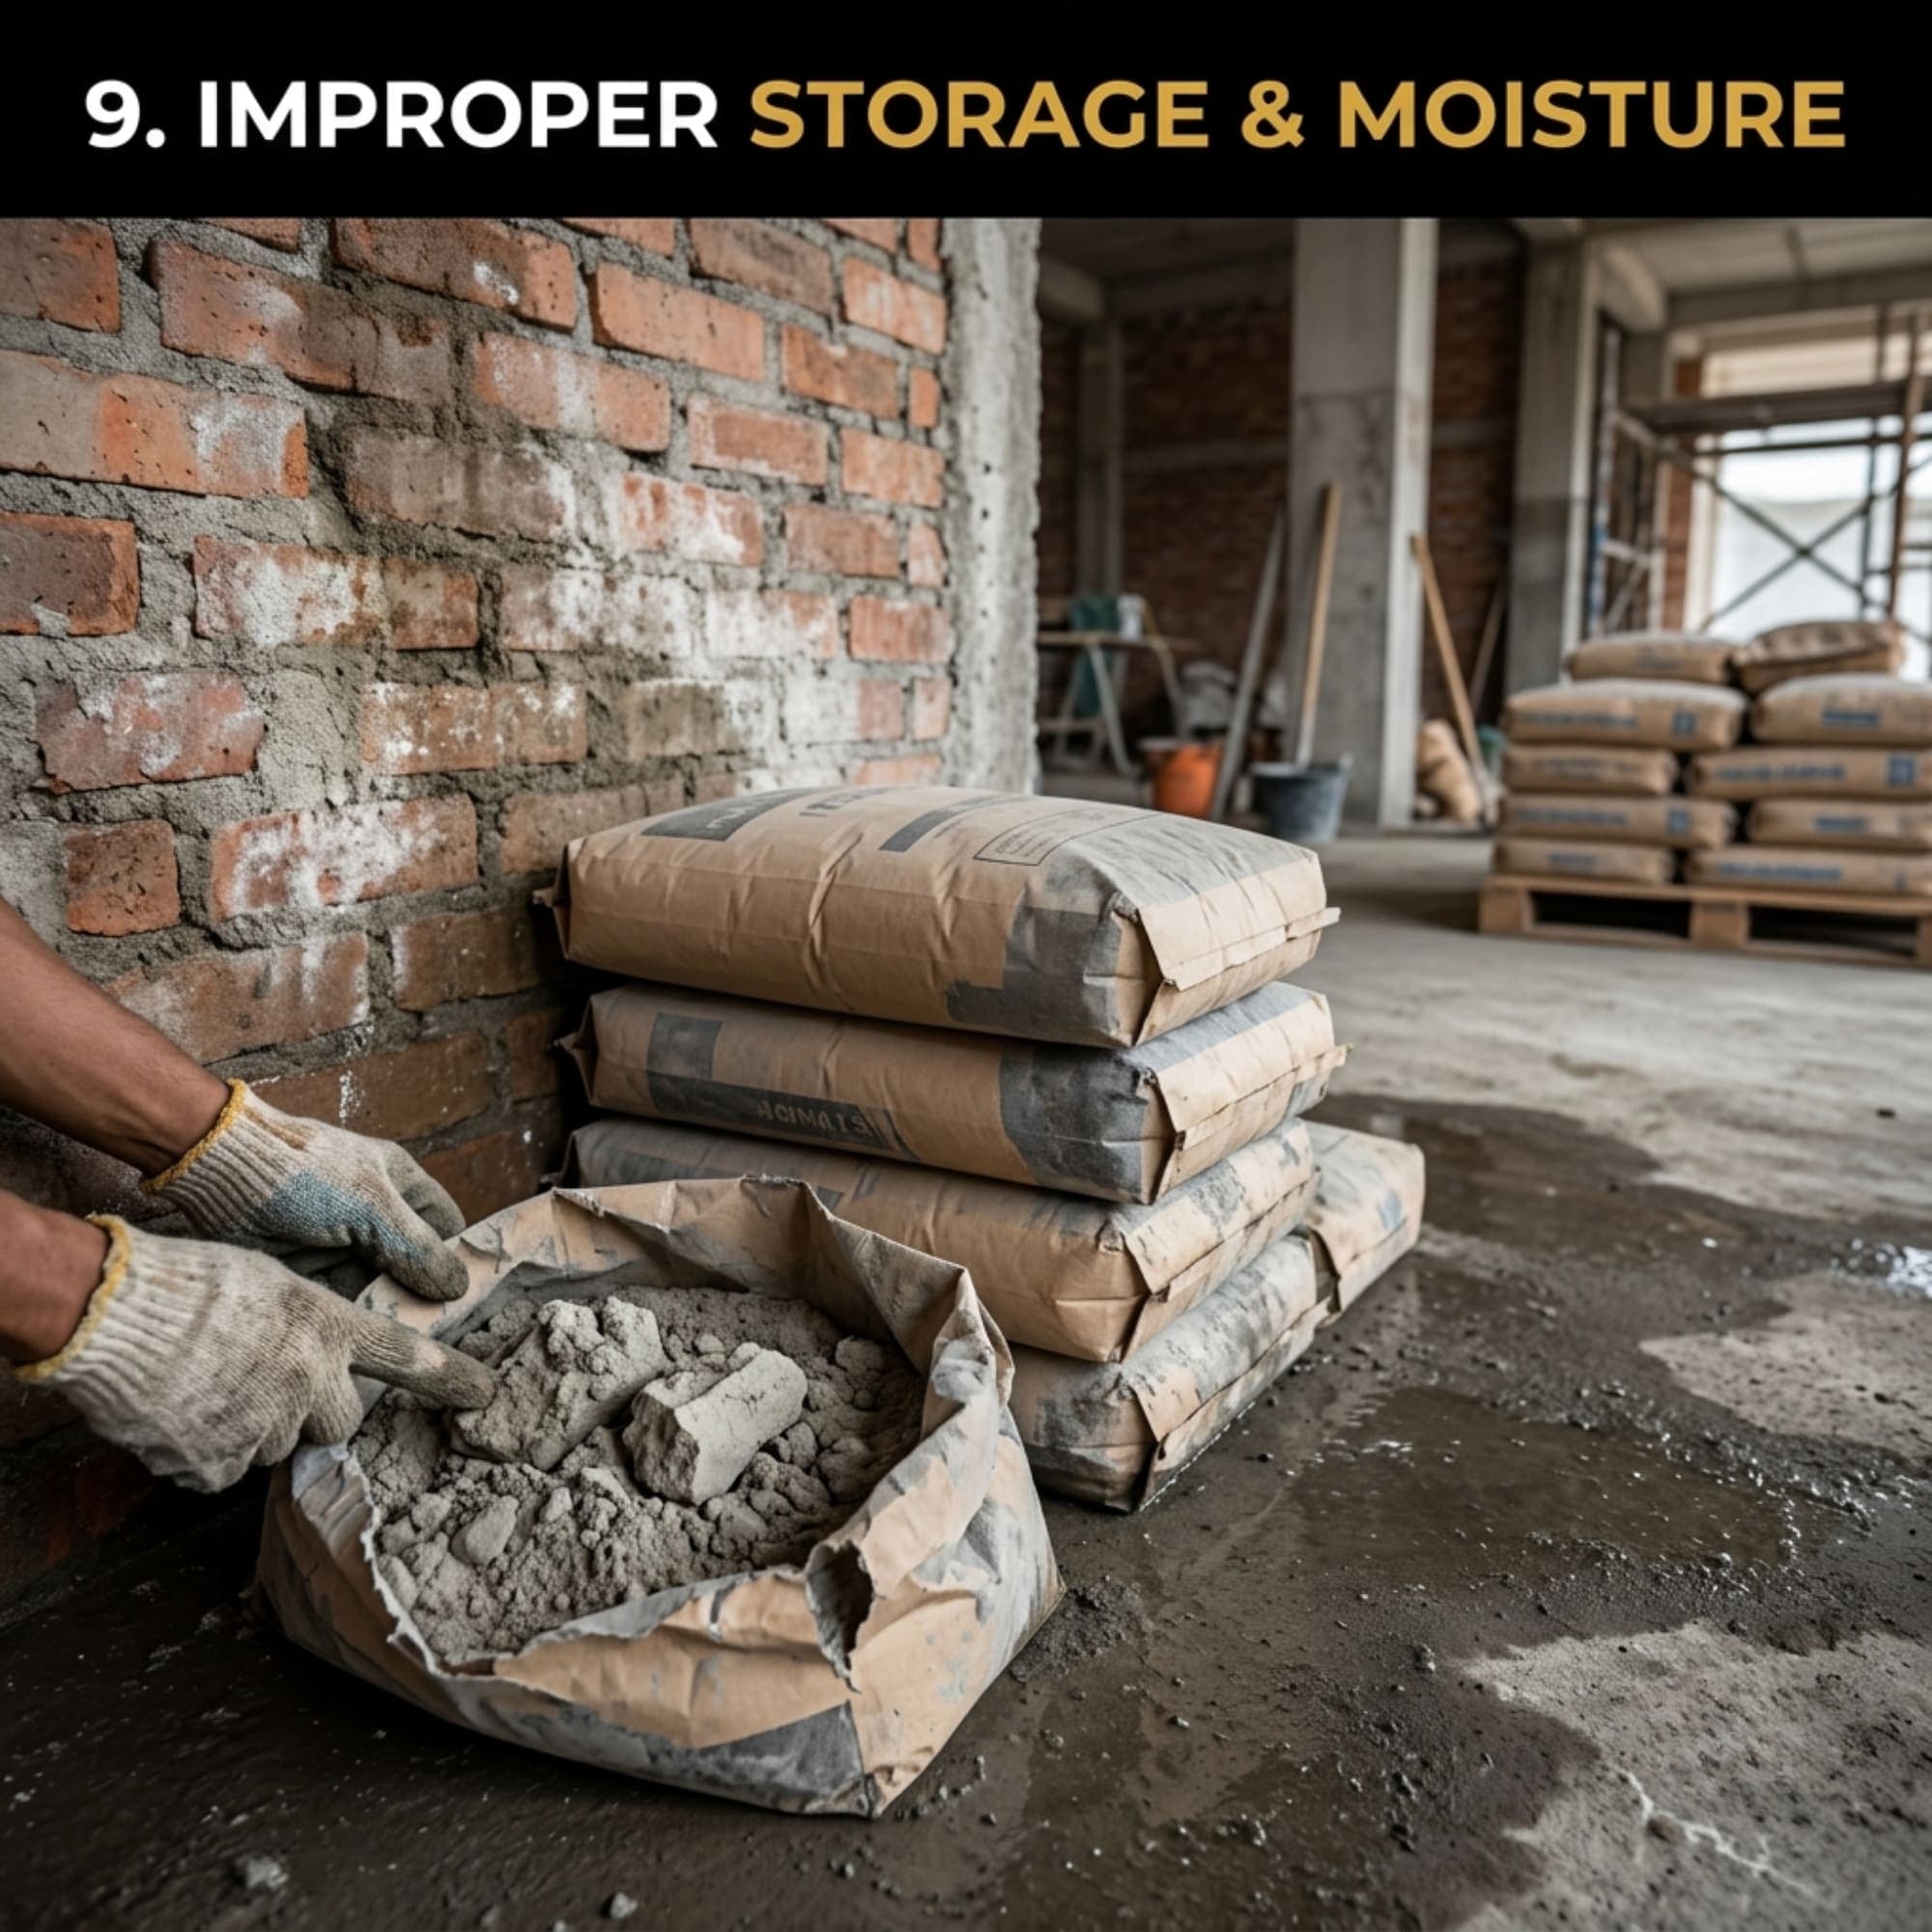
9. एडहेसिव का गलत स्टोरेज या उसमें नमी आना
यदि टाइल एडहेसिव के बैग में नमी चली जाए, पैकिंग खराब हो या प्रोडक्ट को गलत परिस्थितियों में रखा जाए, तो उसकी गुणवत्ता प्रभावित हो सकती है।
समाधान:
- बैग को सूखी जगह पर और ज़मीन से ऊपर पैलेट पर रखें।
- पानी और नमी से सुरक्षित रखें।
- निर्माण तिथि, पैकिंग और स्टोरेज की स्थिति जाँचें।
- नमी से प्रभावित सामग्री का इस्तेमाल न करें।
Improper Storage or Moisture Entering the Adhesive Bag
Most cement-based tile adhesives must be stored in dry conditions.
If bags are kept directly on a damp floor, exposed to rain, or stored in a humid environment, moisture may enter the packaging. The powder can form lumps or begin reacting before use, potentially affecting its performance.
Solution:
- Store adhesive bags in a dry, covered, well-ventilated area.
- Keep bags on pallets rather than directly on the floor.
- Protect the material from rain and moisture.
- Use products within their stated shelf life and follow the storage instructions.
- Do not use material that has deteriorated because of moisture exposure.
એડહેસિવનું અયોગ્ય સ્ટોરેજ અથવા ભેજ લાગવો
ટાઇલ એડહેસિવની બેગમાં ભેજ પ્રવેશે, પેકિંગને નુકસાન થાય અથવા પ્રોડક્ટ અયોગ્ય પરિસ્થિતિમાં સંગ્રહિત થાય, તો તેની ગુણવત્તા અસરગ્રસ્ત થઈ શકે છે.
ઉકેલ:
- બેગને સૂકી જગ્યાએ અને જમીનથી ઉપર પેલેટ પર રાખો.
- ભેજ અને પાણીથી સુરક્ષિત રાખો.
- ઉત્પાદન તારીખ, પેકિંગ અને સ્ટોરેજની સ્થિતિ તપાસો.
- ભેજથી અસરગ્રસ્ત મટિરિયલનો ઉપયોગ ટાળો.
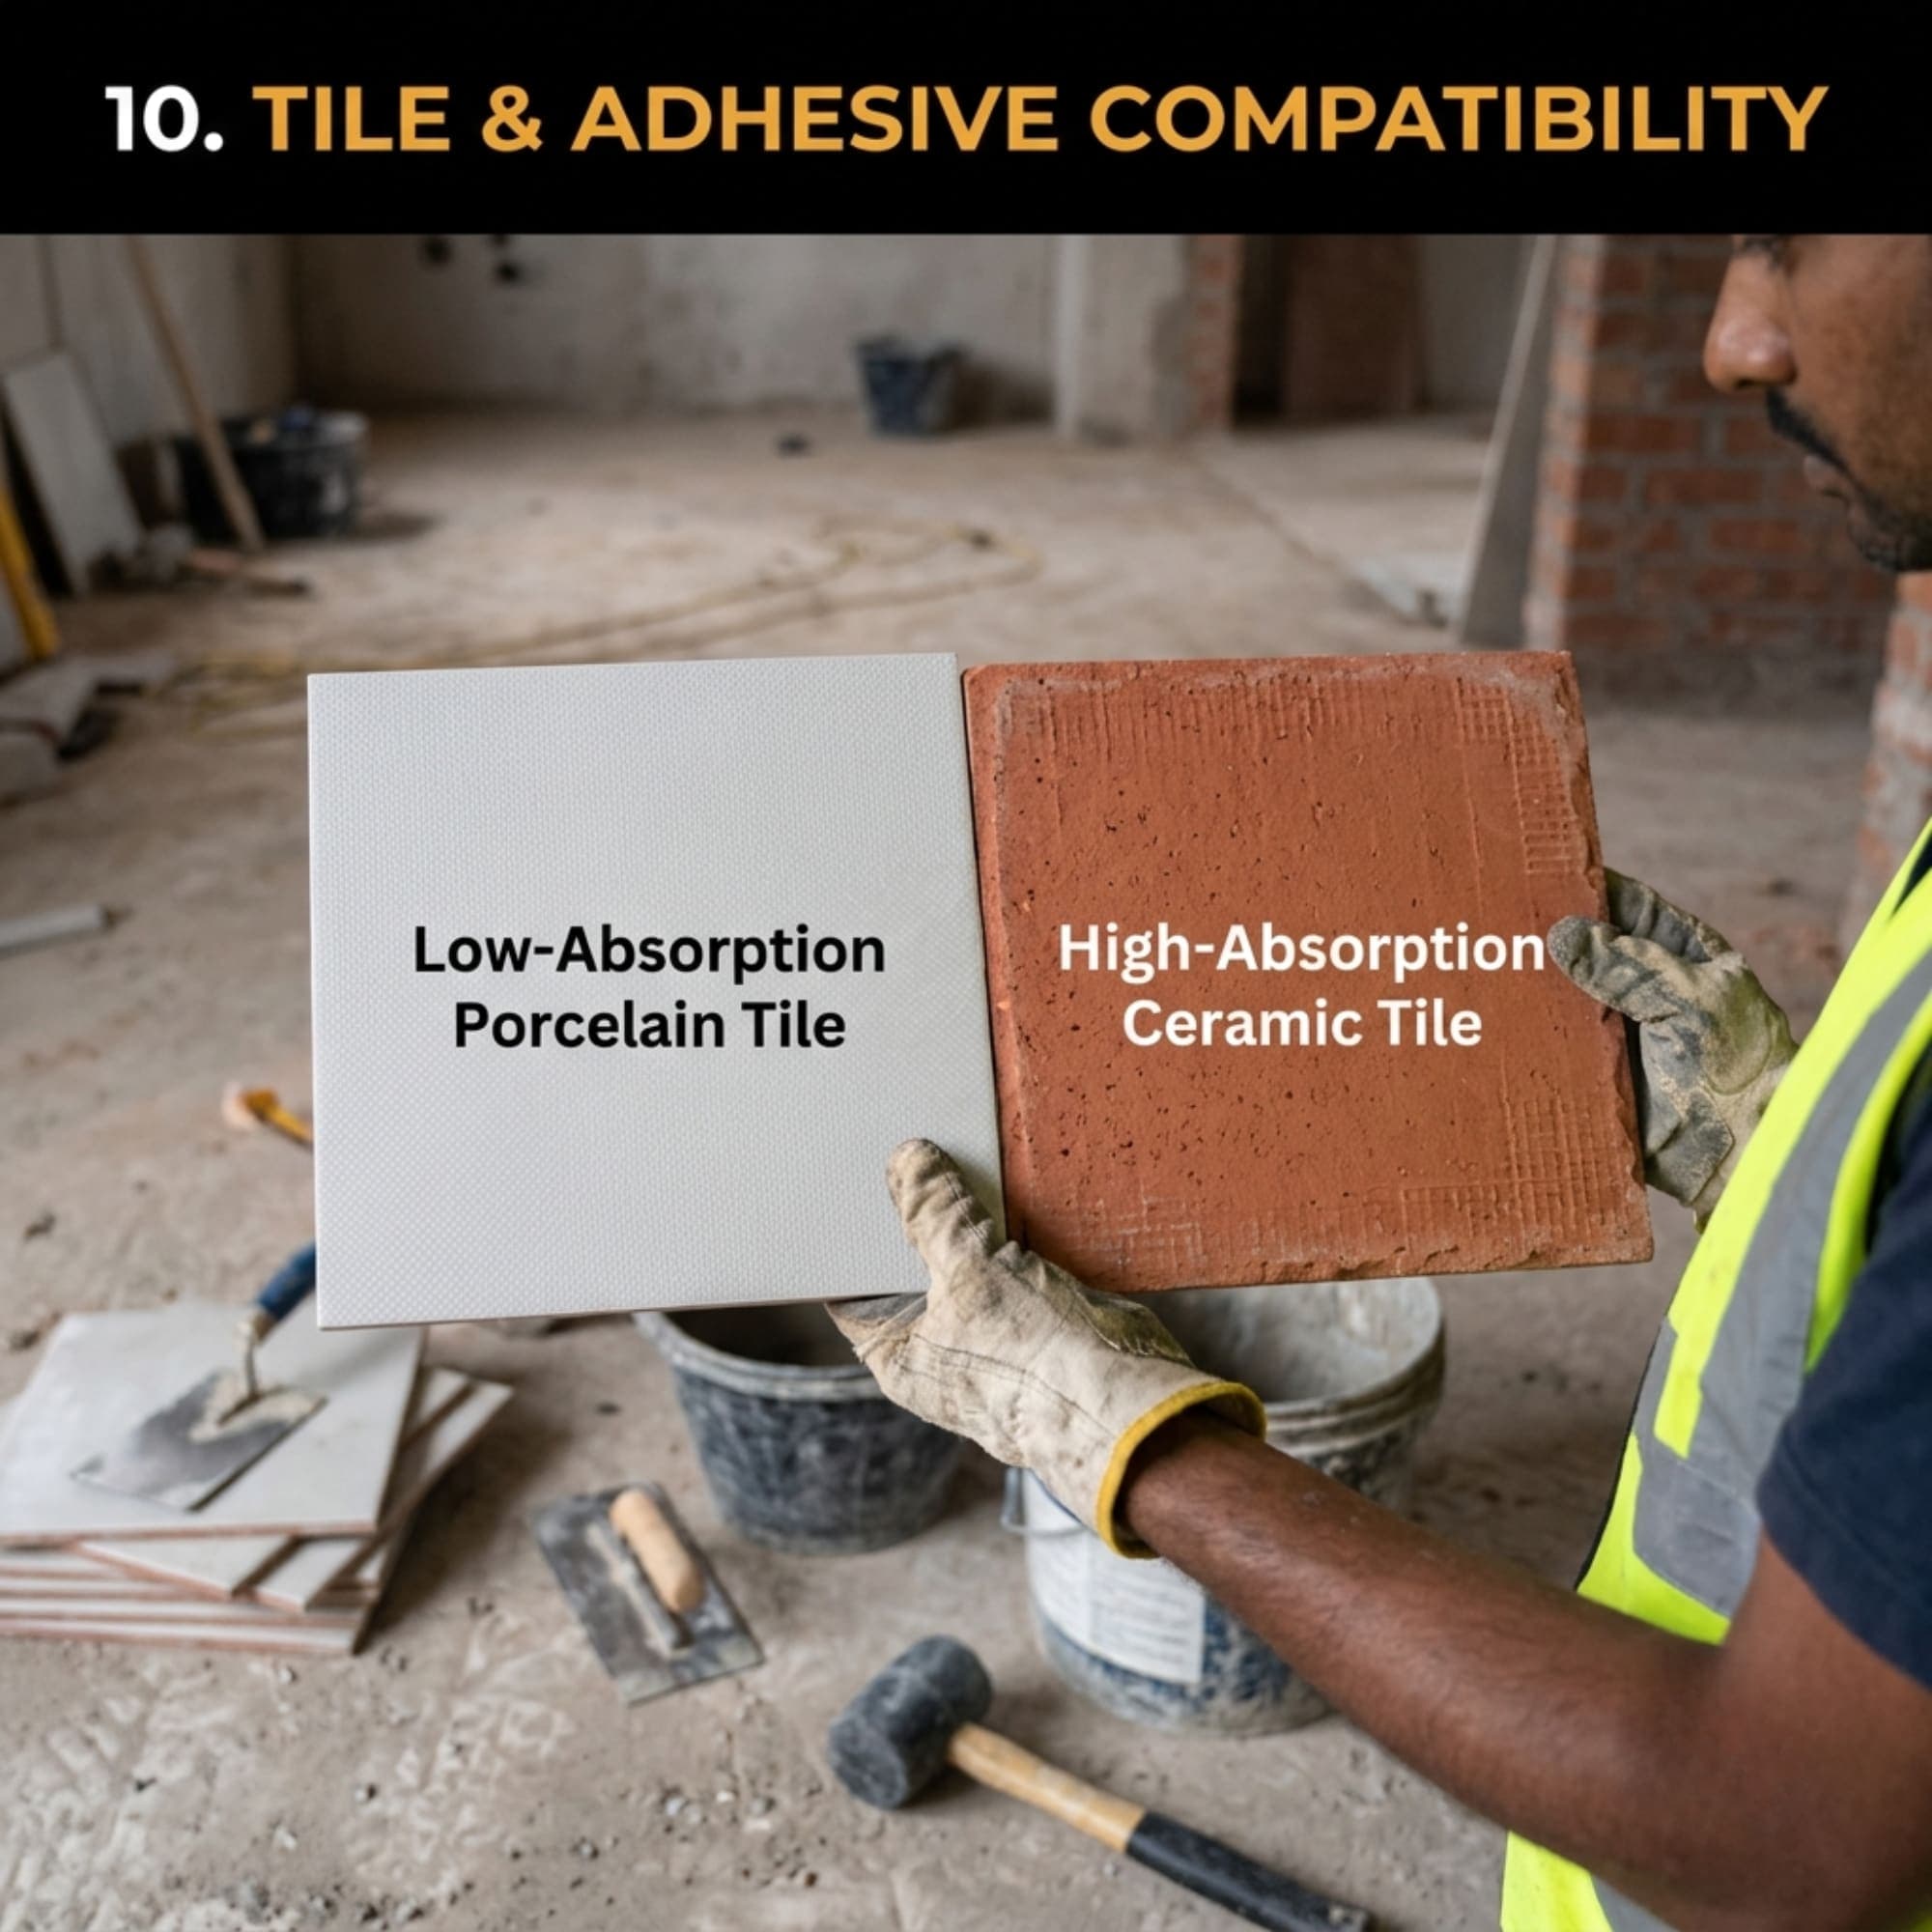
10. टाइल की सतह और एडहेसिव के बीच अनुकूलता न होना
कुछ टाइलों की पिछली सतह बहुत कम पानी सोखती है या उस पर विशेष कोटिंग होती है। ऐसी टाइलों के लिए गलत एडहेसिव ग्रेड या गलत लगाने की विधि अपनाने से बॉन्डिंग कमजोर हो सकती है।
समाधान:
- टाइल के प्रकार और उसकी सतह के अनुसार सही एडहेसिव ग्रेड चुनें।
- टाइल निर्माता के निर्देशों की जाँच करें।
- ज़रूरत पड़ने पर सही परीक्षण करके ही बड़े स्तर पर काम शुरू करें।
Tile Surface Characteristics or Incompatibility With the Adhesive
Not all tiles have the same surface characteristics.
Porcelain tiles, vitrified tiles, glass tiles, and tiles with special coatings may have low water absorption or surfaces that require a specific adhesive. A general-purpose product may not be suitable for every tile type.
The problem is not necessarily that the tile is defective or the adhesive is poor; the two materials may simply be unsuitable for each other in that application.
Solution:
- Identify the tile type and its surface characteristics.
- Select an adhesive specifically suitable for that tile.
- Follow the tile manufacturer's installation recommendations.
- Use a suitable primer or special bonding system only when recommended for the particular substrate and application.
ટાઇલની સપાટી અને એડહેસિવ વચ્ચે સુસંગતતા ન હોવી
કેટલીક ટાઇલની પાછળની સપાટી ખૂબ જ ઓછી શોષક હોય છે અથવા તેના પર ખાસ કોટિંગ હોય છે. આવી ટાઇલ માટે ખોટો એડહેસિવ ગ્રેડ અથવા અયોગ્ય એપ્લિકેશન પદ્ધતિ વાપરવાથી બોન્ડિંગ નબળું પડી શકે છે.
ઉકેલ:
- ટાઇલના પ્રકાર અને સપાટી પ્રમાણે યોગ્ય એડહેસિવ ગ્રેડ પસંદ કરો.
- ટાઇલ ઉત્પાદકની સૂચનાઓ તપાસો.
- જરૂરી હોય ત્યારે યોગ્ય ટેસ્ટ કરીને જ મોટા પ્રમાણમાં કામ શરૂ કરો.
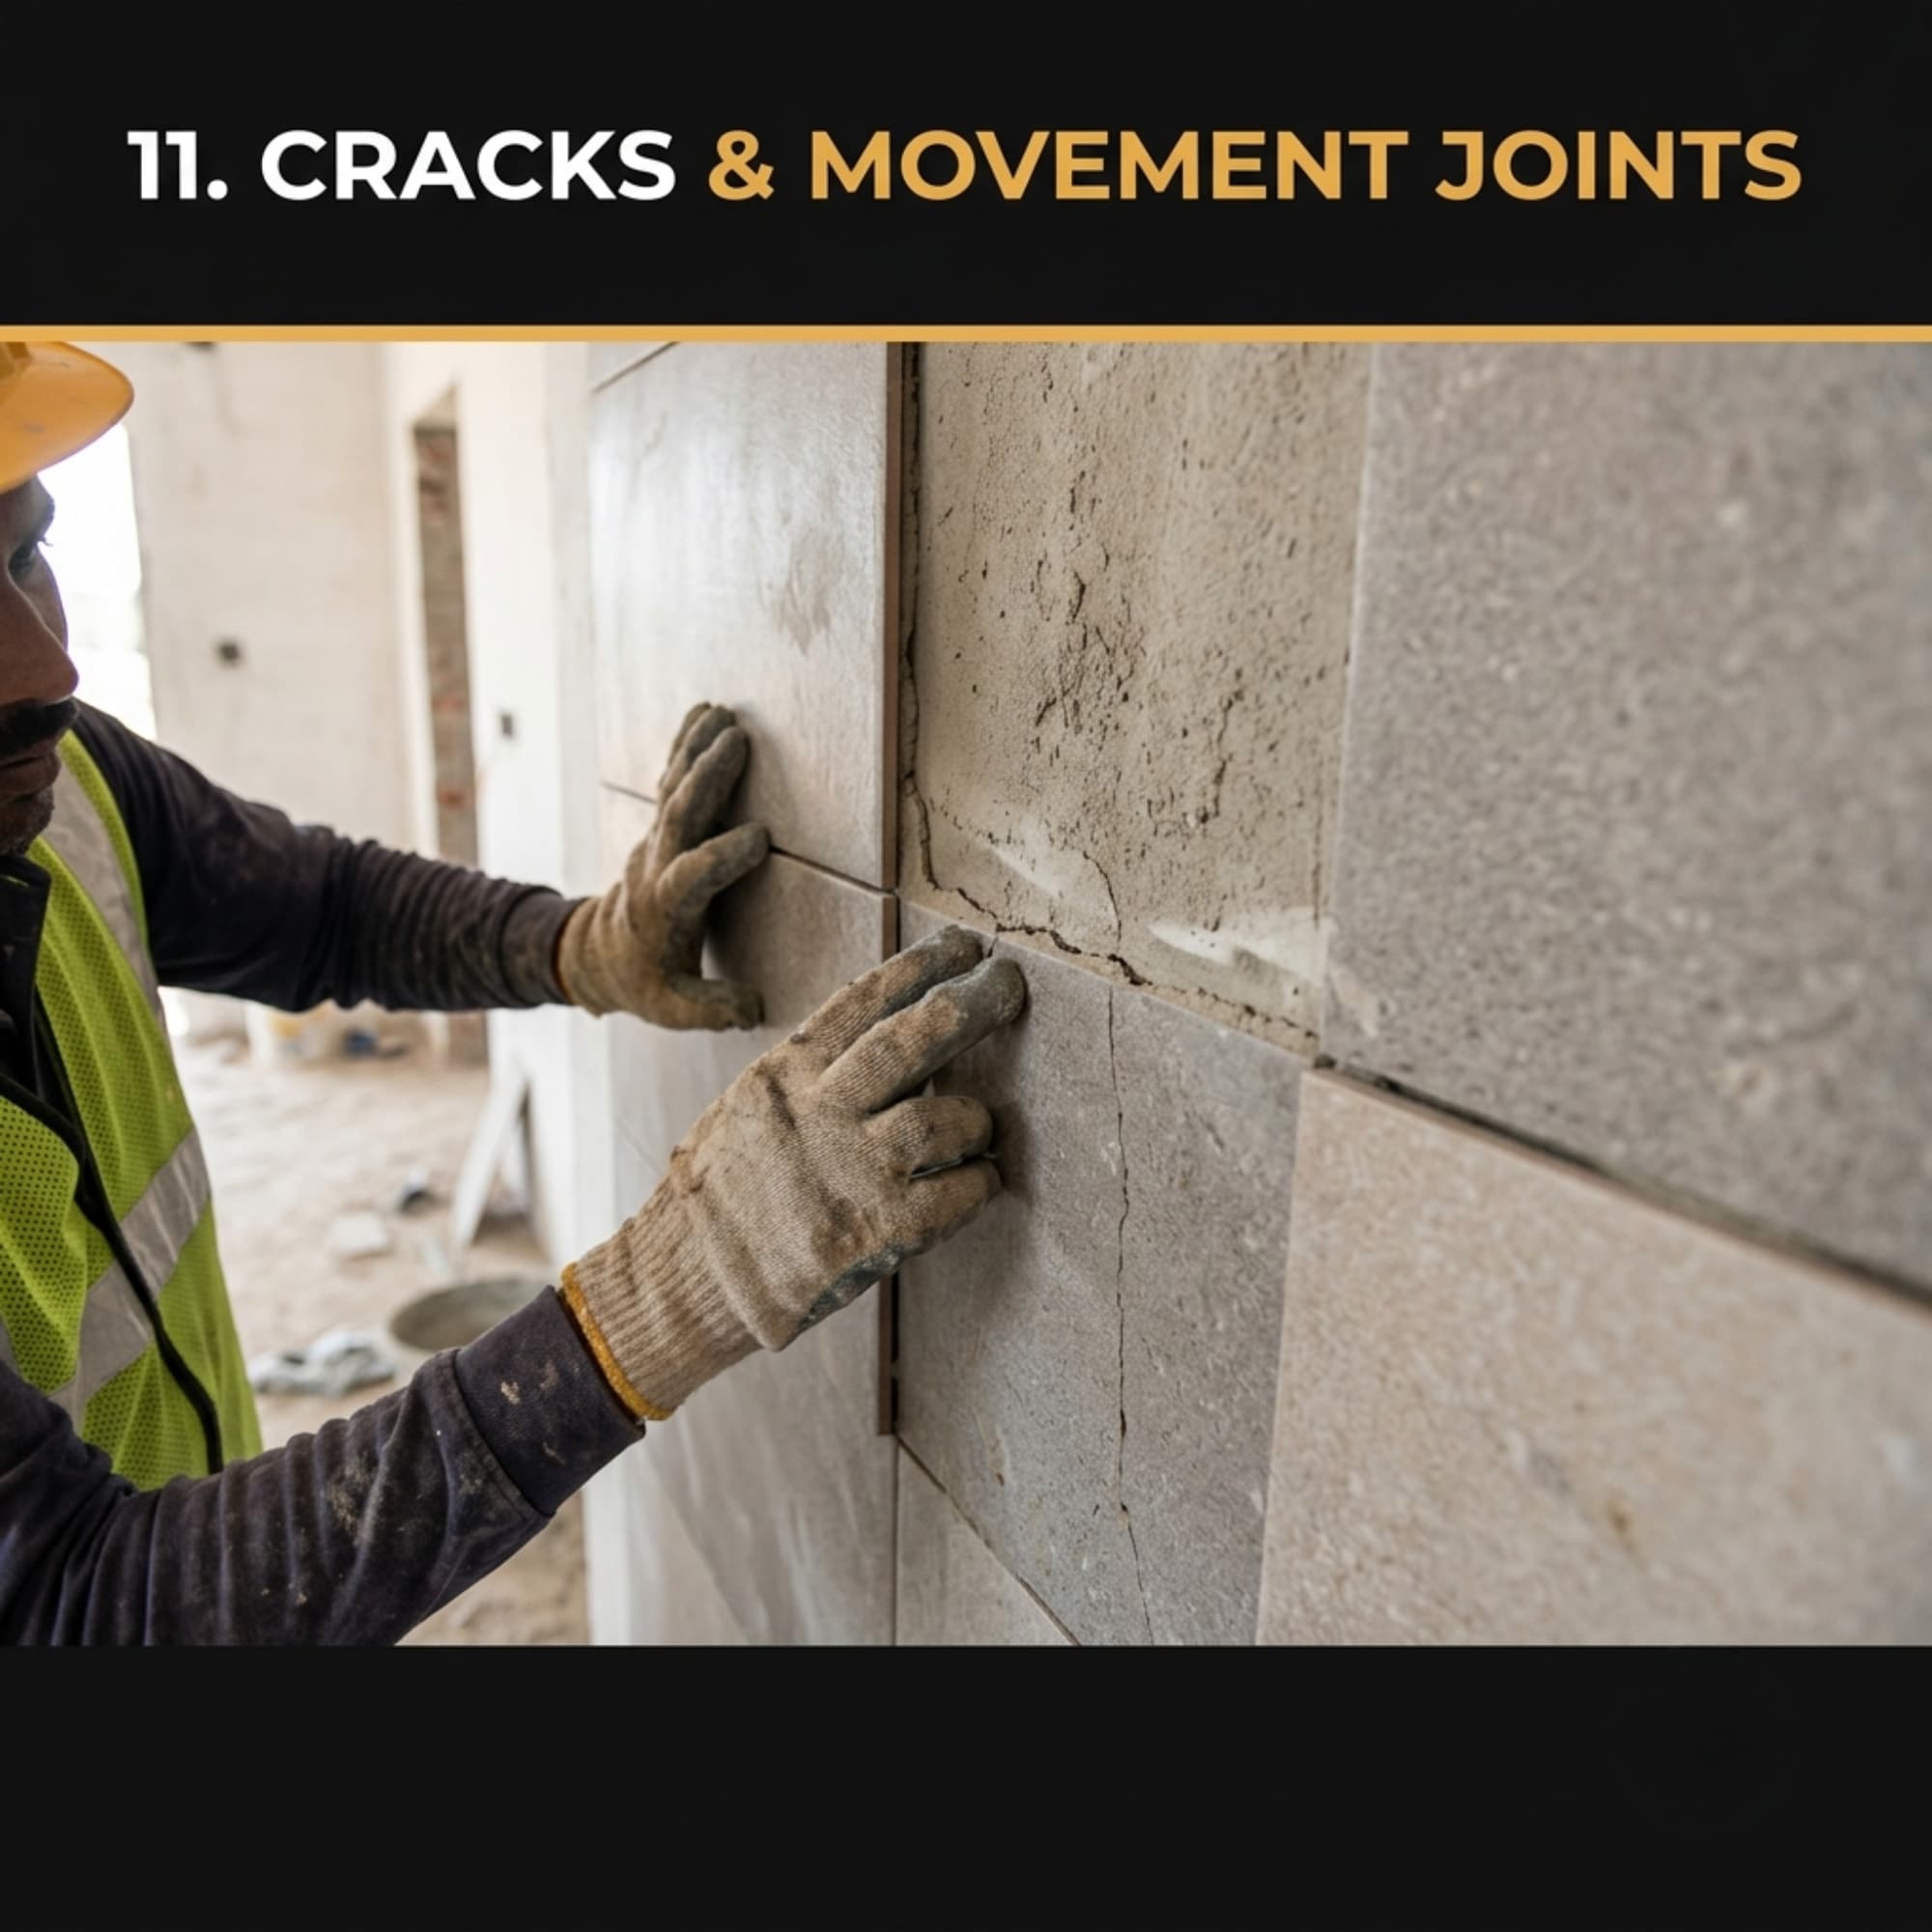
11. दीवार या फर्श में हलचल और दरारें होना
प्लास्टर में दरारें, बिल्डिंग में हलचल, तापमान में बदलाव या उचित Movement Joints न होने के कारण टाइल पर दबाव पड़ सकता है। इसके परिणामस्वरूप टाइल निकल सकती है या टूट सकती है।
समाधान:
- सतह में दरार आने का कारण पता लगाएँ।
- ज़रूरत के अनुसार सही मरम्मत करें।
- उपयोग की स्थिति के अनुसार आवश्यक Movement Joints बनाएँ।
- सही जाँच किए बिना केवल एडहेसिव बदलकर समस्या हल करने की कोशिश न करें।
Building Movement, Cracks, or Missing Movement Joints
Buildings and construction materials can expand, contract, shrink, or move because of temperature changes, moisture variations, structural movement, and other factors.
If the tile installation does not accommodate the expected movement, stresses may develop within the tiled surface. These stresses can lead to cracked grout, cracked tiles, hollow areas, or tile detachment.
Solution:
- Identify and address substrate cracks before tiling.
- Provide movement joints where required by the design and applicable installation guidelines.
- Do not fill movement joints rigidly with ordinary grout or adhesive.
- Use a suitable flexible joint sealant or specified movement-joint system.
- Select an adhesive with the appropriate deformation characteristics for the application.
દિવાલ અથવા ફ્લોરમાં હલનચલન અને ક્રેક
પ્લાસ્ટરમાં ક્રેક, બિલ્ડિંગની હલનચલન, તાપમાનના ફેરફાર અથવા યોગ્ય Movement Joints ન હોવાને કારણે ટાઇલ પર તાણ આવી શકે છે. પરિણામે ટાઇલ છૂટી શકે છે અથવા તૂટી પણ શકે છે.
ઉકેલ:
- સપાટીમાં ક્રેકનું કારણ ઓળખો.
- જરૂર મુજબ યોગ્ય રિપેર કરો.
- એપ્લિકેશન પ્રમાણે જરૂરી Movement Jointsની વ્યવસ્થા કરો.
- યોગ્ય ડિઝાઇન વિના માત્ર એડહેસિવ બદલીને સમસ્યા ઉકેલવાનો પ્રયાસ ન કરો.
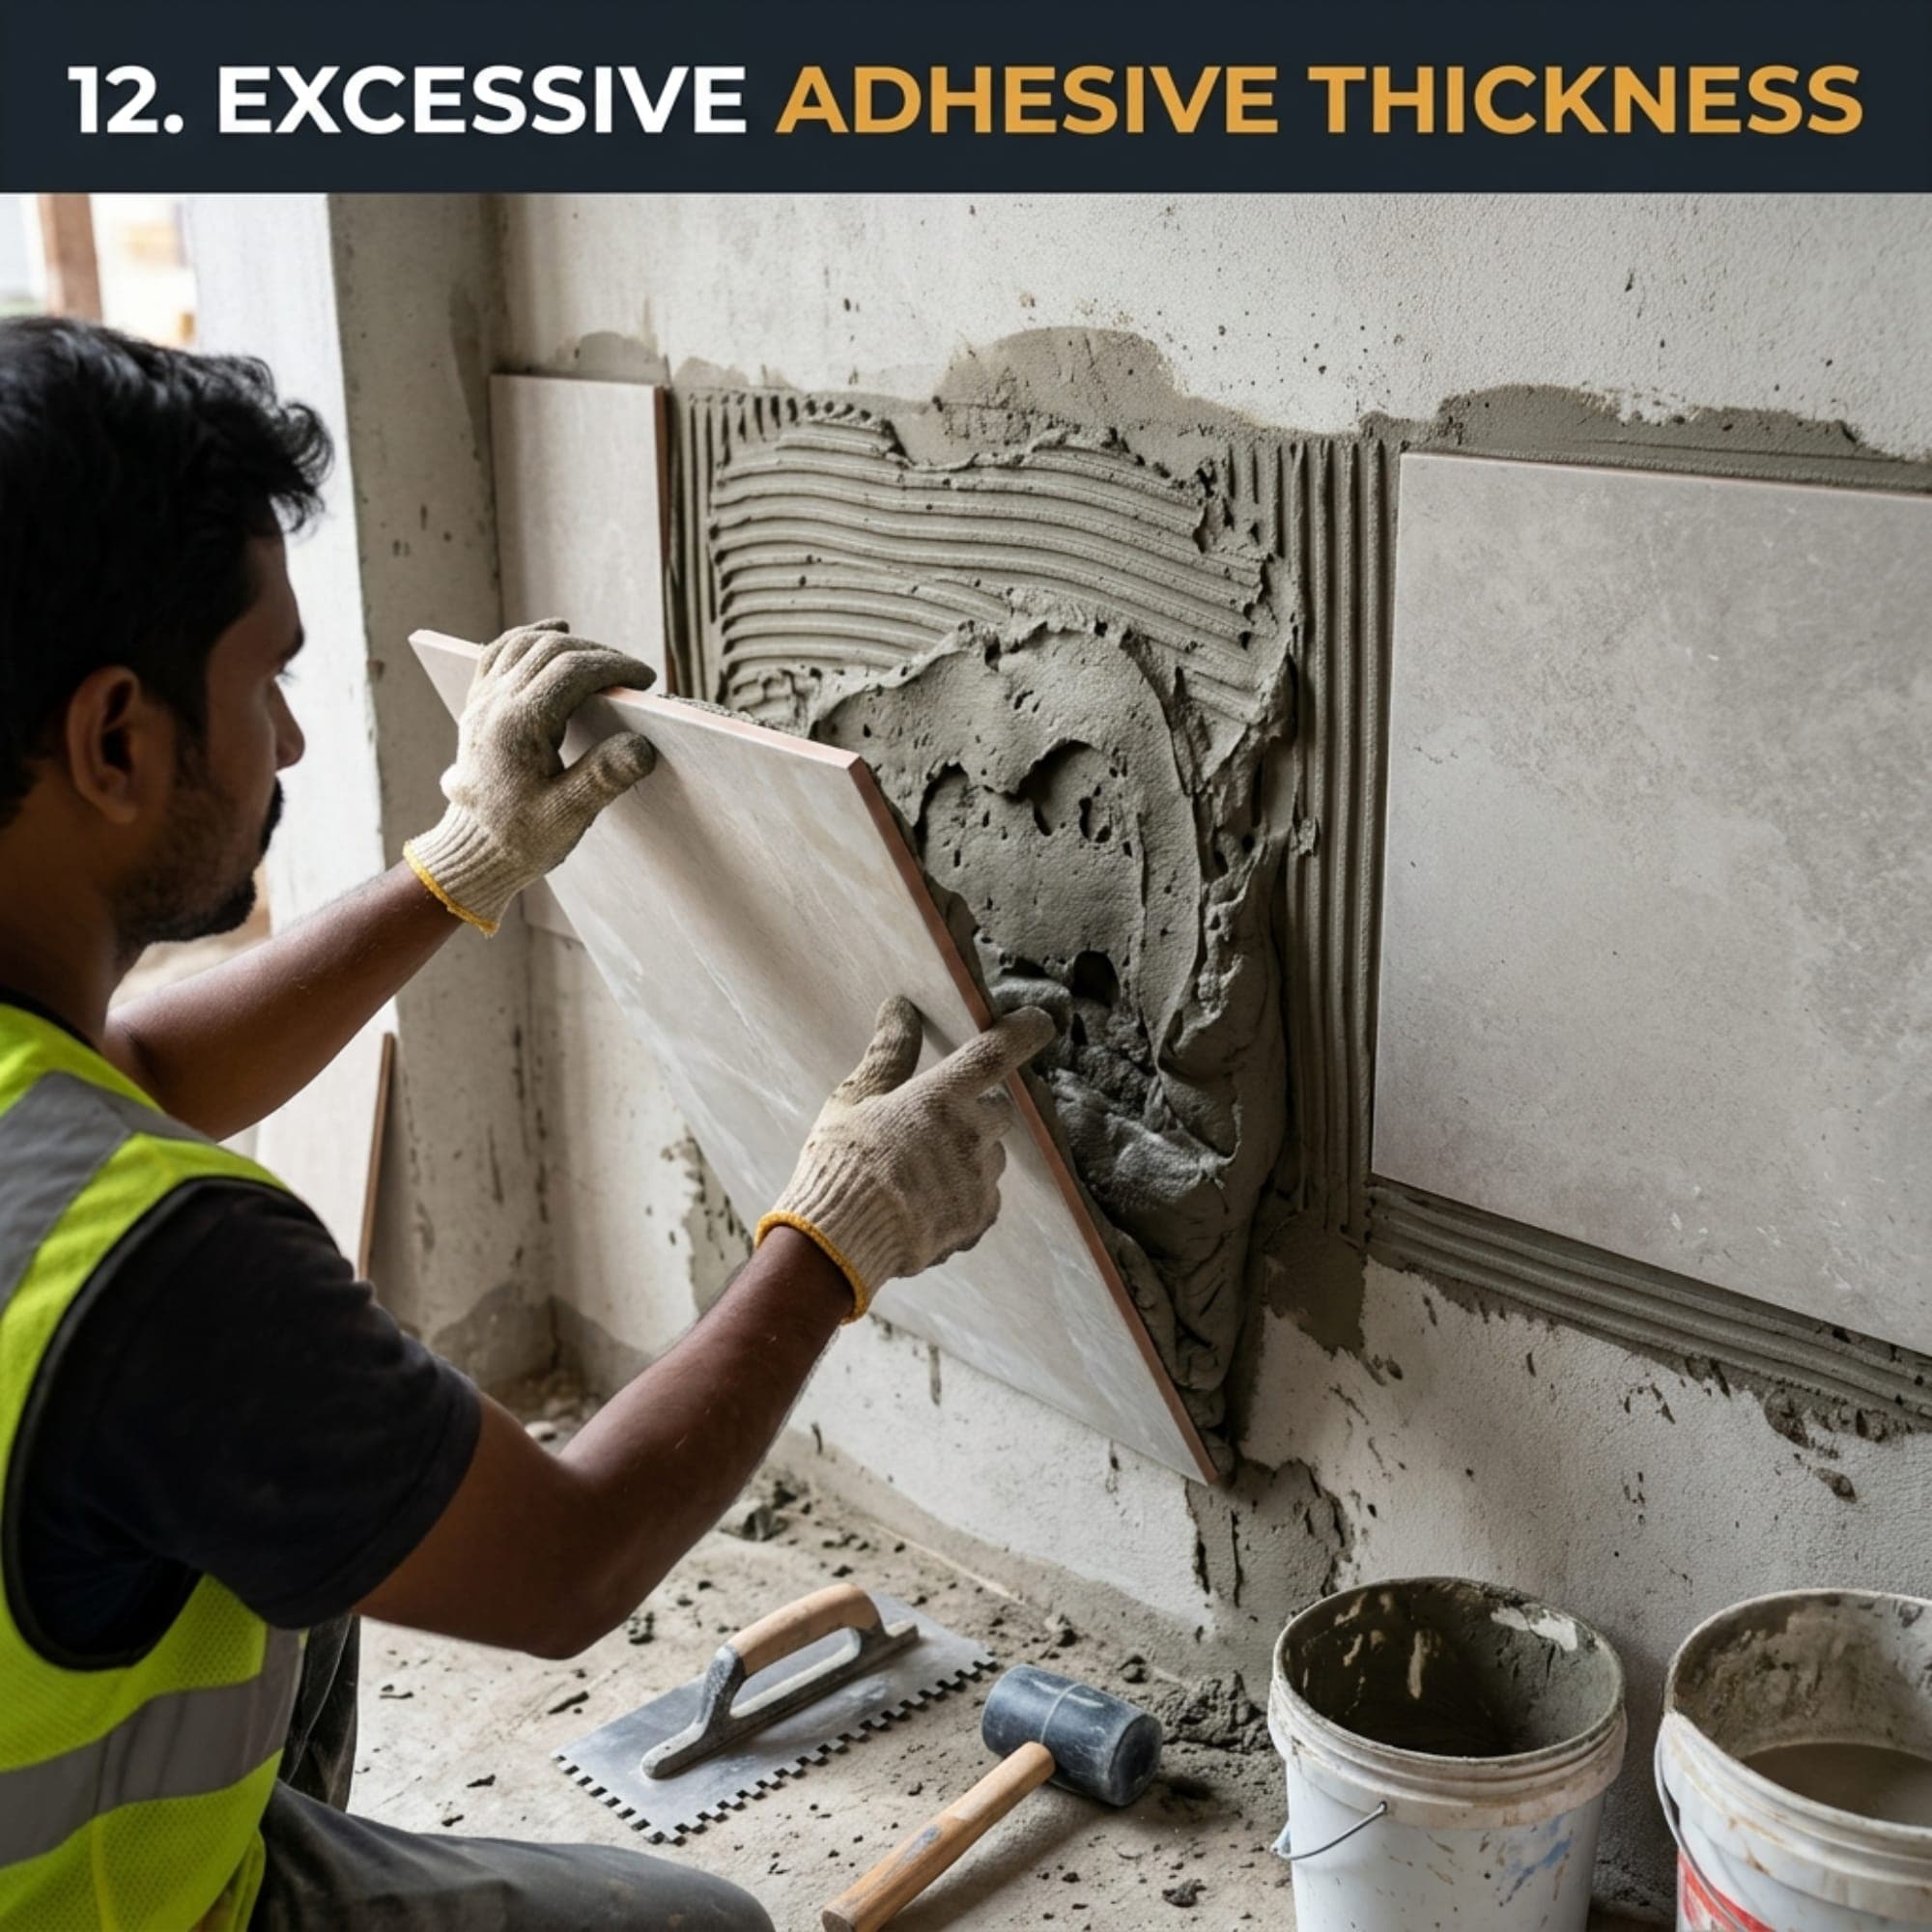
12. टाइल के पीछे आवश्यकता से अधिक एडहेसिव लगाना
कई बार मिस्त्री टाइल के पीछे आवश्यकता से अधिक एडहेसिव लगा देते हैं या दीवार और टाइल के बीच की दूरी भरने के लिए बहुत मोटी परत बना देते हैं।
आवश्यकता से अधिक मोटी परत के कारण असमान सूखना, सिकुड़ना या टाइल को सही तरीके से बैठाने में परेशानी हो सकती है। इससे बॉन्डिंग की समस्या उत्पन्न हो सकती है।
समाधान:
- सही नॉच वाली ट्रॉवेल का इस्तेमाल करें।
- एडहेसिव की अनावश्यक मोटी परत न बनाएँ।
- बड़ी टाइलों के लिए ज़रूरत होने पर सही तरीके से Back-Buttering करें।
- दीवार की असमानता दूर करने के लिए उचित प्लास्टर या लेवलिंग सामग्री का इस्तेमाल करें।
महत्वपूर्ण: टाइल के पीछे एडहेसिव लगाना गलत नहीं है। सही तरीके से किया गया Back-Buttering बड़ी टाइलों में संपर्क बेहतर बनाने में मदद करता है। समस्या तब हो सकती है, जब एडहेसिव की परत अनावश्यक रूप से मोटी या असमान हो।
Applying an Excessively Thick or Uneven Adhesive Layer
Tile adhesive must be applied within the thickness range recommended by the manufacturer.
If the adhesive layer is excessively thick or uneven, it may shrink unevenly, dry or harden differently across the installation, or fail to provide consistent support. This can contribute to cracking, hollow areas, or tile movement.
Important: Back-buttering—applying a thin layer of adhesive to the back of a tile—is not inherently wrong. It can be a recommended installation method for certain tiles and applications. Problems arise when the total adhesive thickness is unsuitable or the installation method does not follow the product instructions.
Solution:
- Use the recommended trowel size and application method.
- Keep the adhesive thickness within the manufacturer's specified range.
- Correct significant substrate unevenness before tiling rather than using excessive adhesive to level the surface.
- Follow the appropriate installation method for large-format tiles.
ટાઇલની પાછળ જરૂર કરતાં વધારે એડહેસિવ લગાવવું
ઘણી વખત મિસ્ત્રી ટાઇલની પાછળ જરૂર કરતાં વધારે એડહેસિવ લગાવે છે અથવા દિવાલ અને ટાઇલ વચ્ચેનું અંતર ભરવા માટે એડહેસિવનો ખૂબ જાડો થર બનાવે છે.
જરૂર કરતાં વધારે જાડો થર બનાવવાથી અસમાન સૂકવણી, સંકોચન અથવા યોગ્ય રીતે ટાઇલ બેસાડવામાં મુશ્કેલી થઈ શકે છે. પરિણામે બોન્ડિંગની સમસ્યા ઊભી થઈ શકે છે.
ઉકેલ:
- યોગ્ય નોચવાળી ટ્રોવેલનો ઉપયોગ કરો.
- એડહેસિવનો અનાવશ્યક જાડો થર ન બનાવો.
- ટાઇલની પાછળ Back-Buttering જરૂરી હોય ત્યારે યોગ્ય રીતે કરો.
- દિવાલની અસમાનતા દૂર કરવા માટે યોગ્ય પ્લાસ્ટર અથવા લેવલિંગ મટિરિયલનો ઉપયોગ કરો.
મહત્વપૂર્ણ: ટાઇલની પાછળ એડહેસિવ લગાવવું ખોટું નથી. યોગ્ય Back-Buttering મોટી ટાઇલમાં સંપર્ક સુધારવામાં મદદરૂપ થાય છે. સમસ્યા ત્યારે થઈ શકે છે જ્યારે એડહેસિવ અનાવશ્યક જાડું અથવા અસમાન લગાવવામાં આવે.
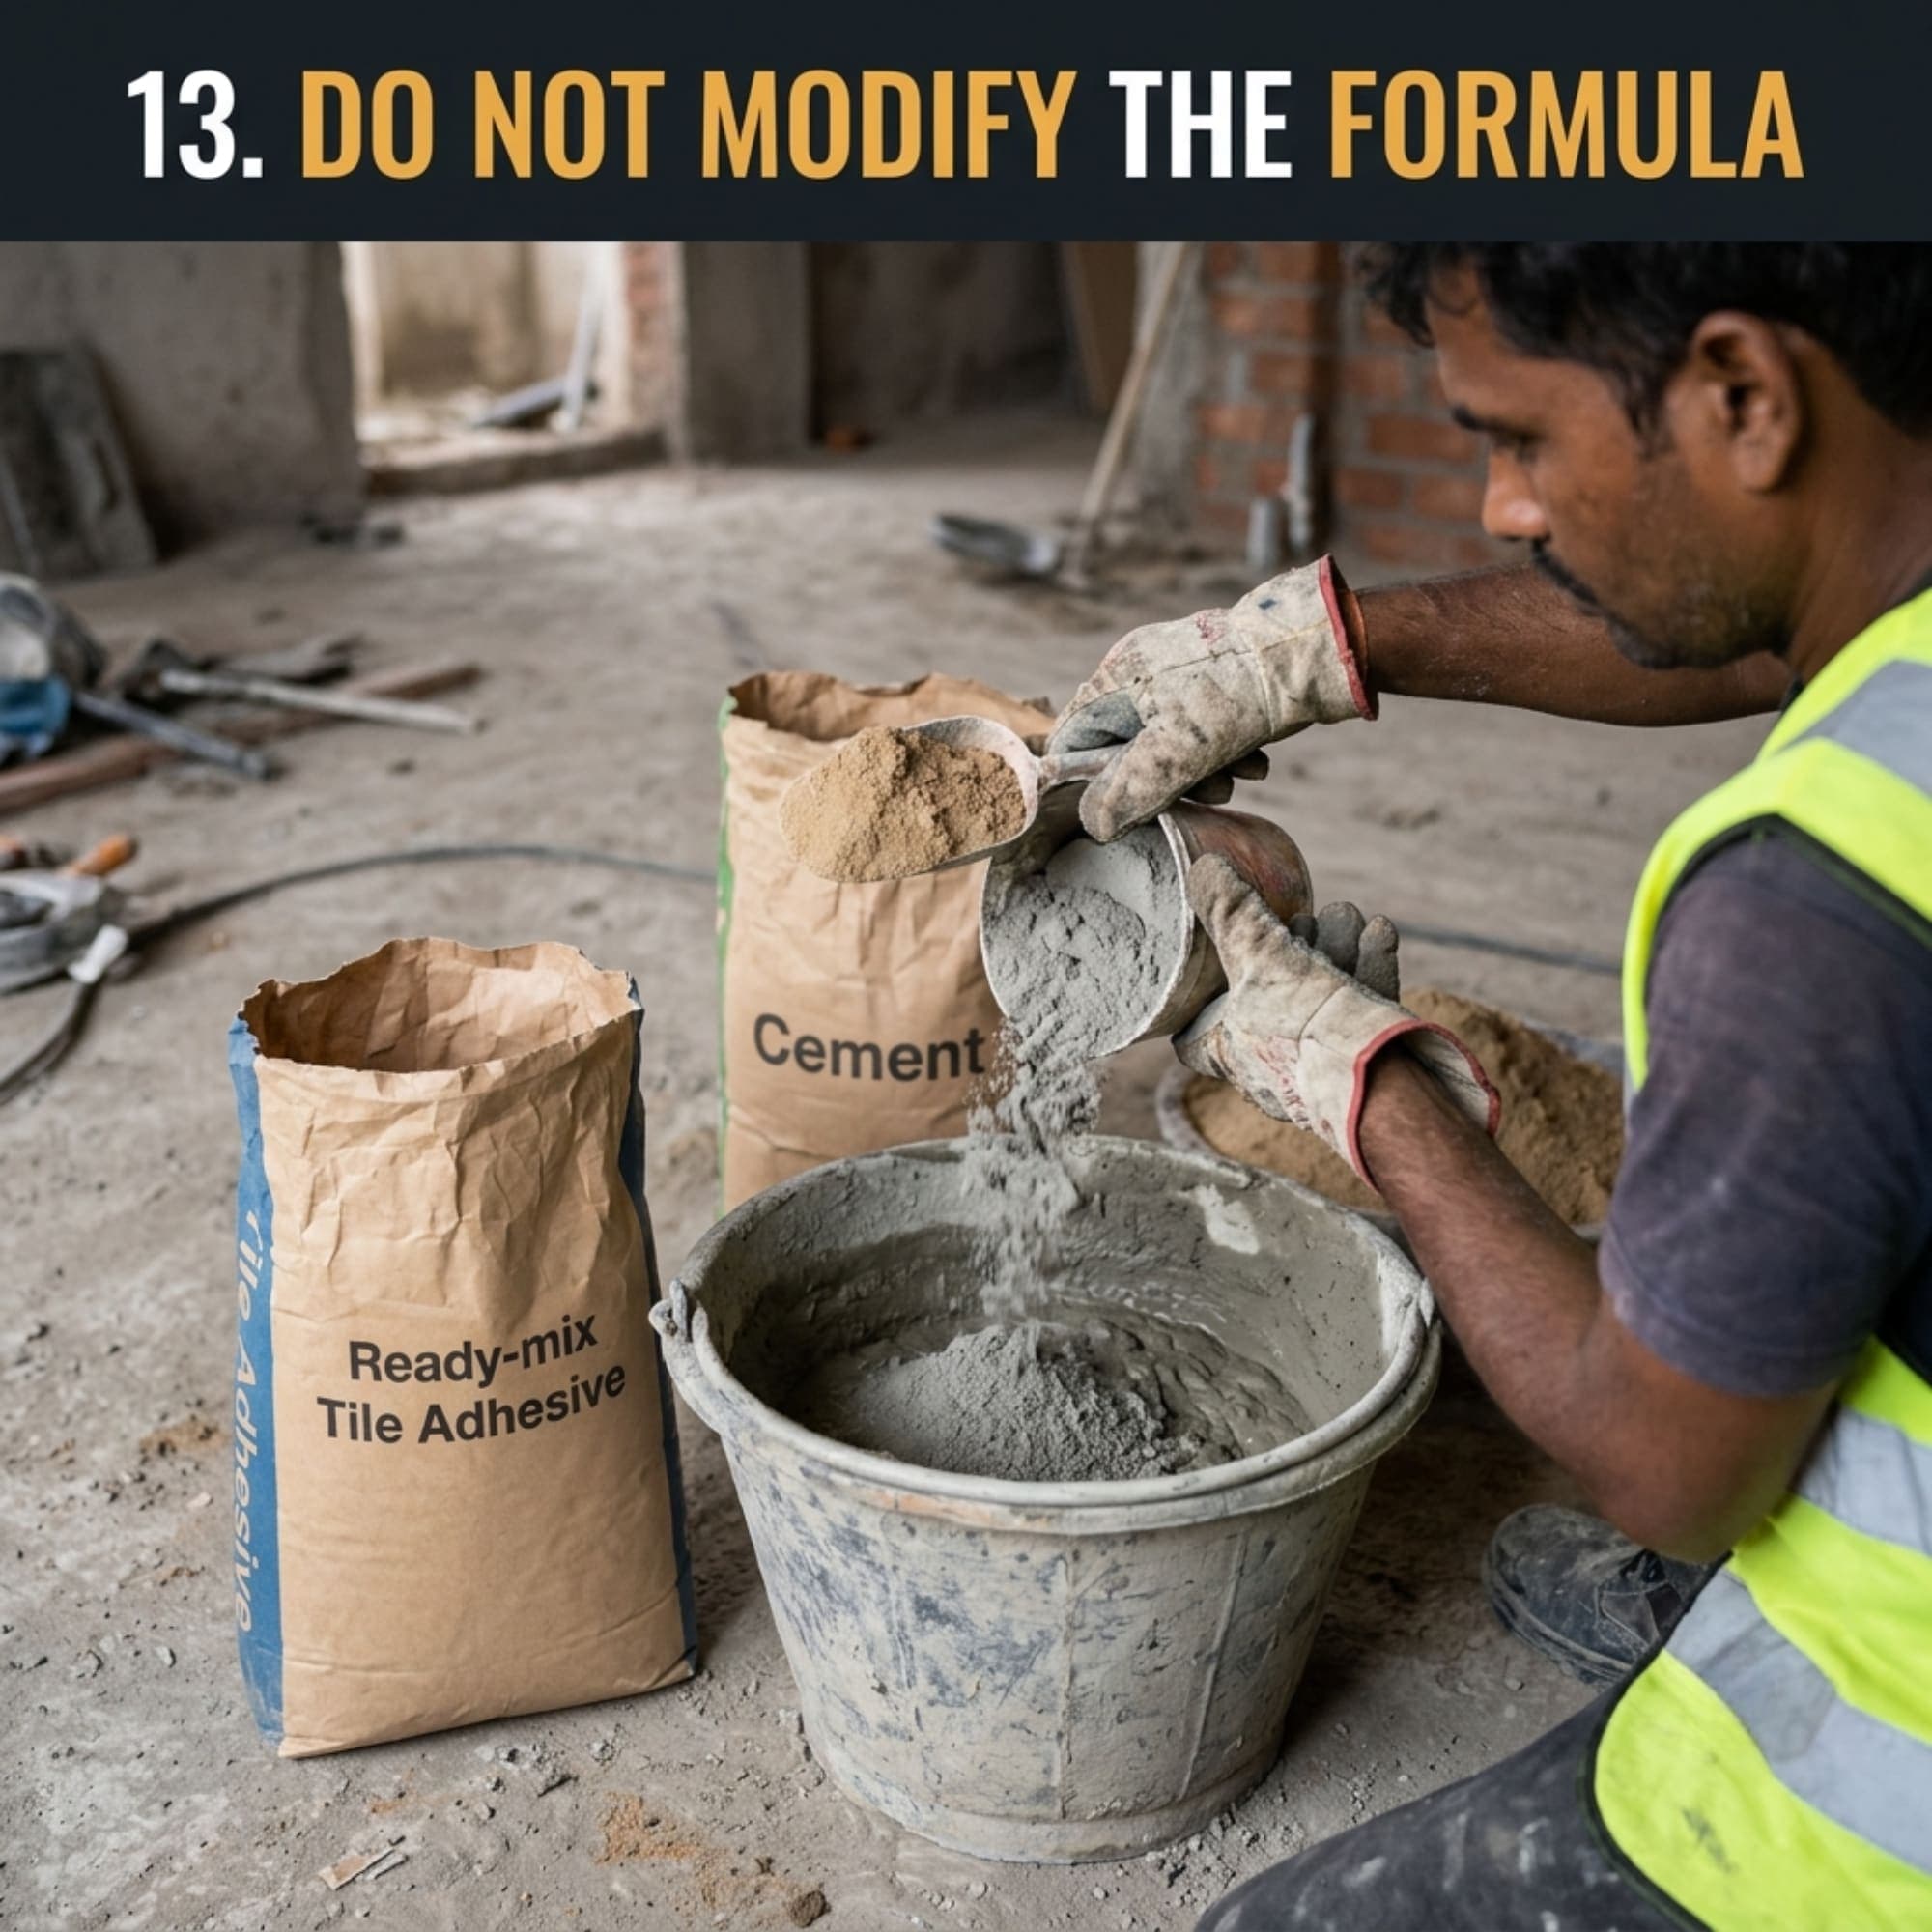
13. टाइल एडहेसिव में अतिरिक्त सीमेंट या रेत मिलाना
कई साइटों पर मिस्त्री टाइल एडहेसिव में अतिरिक्त सीमेंट या रेत मिलाते हुए दिखाई देते हैं। ऐसा सामग्री बढ़ाने, लागत कम करने या मिश्रण को अपनी सुविधा के अनुसार गाढ़ा या पतला बनाने के लिए किया जा सकता है।
लेकिन टाइल एडहेसिव एक तैयार फॉर्मूलेशन है, जिसमें सीमेंट, पॉलिमर और अन्य घटकों को निश्चित अनुपात में मिलाया जाता है। इसमें अपनी तरफ से सीमेंट या रेत मिलाने से मूल फॉर्मूलेशन बदल जाता है।
इसके कारण:
- कुल मिश्रण की तुलना में पॉलिमर और अन्य घटकों का अनुपात कम हो सकता है।
- एडहेसिव की कार्यक्षमता और बॉन्डिंग का प्रदर्शन बदल सकता है।
- पानी की आवश्यकता और मिश्रण की एकरूपता प्रभावित हो सकती है।
- अतिरिक्त रेत से कणों का अनुपात और आकार बदल सकता है।
- तैयार मिश्रण का प्रदर्शन निर्माता द्वारा परीक्षण किए गए परिणामों से अलग हो सकता है।
समाधान:
- टाइल एडहेसिव में अपनी तरफ से सीमेंट या रेत न मिलाएँ।
- पैकिंग या Technical Data Sheet में बताई गई मिक्सिंग विधि का पालन करें।
- साइट पर मिस्त्रियों को सही मिक्सिंग और लगाने की विधि समझाएँ।
- यदि मिश्रण में अतिरिक्त सामग्री मिलाई गई है, तो उसे मूल प्रोडक्ट के समान गुणवत्ता वाला न मानें।
महत्वपूर्ण: सीमेंट या रेत मिलाने से हर स्थिति में टाइल ज़रूर निकलेगी, ऐसा नहीं है। लेकिन इससे प्रोडक्ट का मूल फॉर्मूलेशन बदल जाता है और बॉन्डिंग की समस्या का जोखिम बढ़ सकता है।
Adding Extra Cement or Sand to Ready-Made Tile Adhesive
Ready-made tile adhesive is a carefully formulated product containing cement, graded fillers, polymers, and other performance-enhancing ingredients in specific proportions.
Sometimes, installers add extra cement or sand to reduce material costs or change the consistency. This changes the original formulation and can affect adhesion, workability, flexibility, water retention, and other performance properties.
However, adding cement or sand does not automatically mean that every installation will fail. The actual outcome depends on the materials, proportions, application, and site conditions. Nevertheless, modifying a factory-formulated adhesive without the manufacturer's approval introduces unnecessary performance risks.
Solution:
- Use ready-made tile adhesive as supplied by the manufacturer.
- Add only the specified quantity of clean water or any expressly approved additive.
- Never mix extra cement or sand into the product unless the manufacturer specifically permits it.
- Train installers to follow the product's instructions rather than modifying the mixture on-site.
ટાઇલ એડહેસિવમાં વધારાનું સિમેન્ટ અથવા રેતી ઉમેરવી
કેટલીક સાઇટ પર મિસ્ત્રી ટાઇલ એડહેસિવમાં સિમેન્ટ અથવા રેતી ઉમેરતા જોવા મળે છે. આવું મટિરિયલ વધારવા, ખર્ચ ઘટાડવા અથવા મિશ્રણને પોતાની રીતે જાડું કે પાતળું બનાવવા માટે કરવામાં આવી શકે છે.
પરંતુ ટાઇલ એડહેસિવ એક તૈયાર ફોર્મ્યુલેશન છે, જેમાં સિમેન્ટ, પોલિમર અને અન્ય ઘટકો ચોક્કસ પ્રમાણમાં મિક્સ કરવામાં આવેલા હોય છે. તેમાં પોતાની રીતે સિમેન્ટ અથવા રેતી ઉમેરવાથી મૂળ ફોર્મ્યુલેશન બદલાઈ જાય છે.
આના કારણે:
- પોલિમર અને અન્ય ઘટકોનું પ્રમાણ કુલ મિશ્રણની સરખામણીમાં ઘટી શકે છે.
- એડહેસિવની કાર્યક્ષમતા અને બોન્ડિંગની કામગીરી બદલાઈ શકે છે.
- પાણીની જરૂરિયાત અને મિશ્રણની સુસંગતતા બદલાઈ શકે છે.
- વધારાની રેતીને કારણે કણોનું પ્રમાણ અને કદ બદલાઈ શકે છે.
- તૈયાર થયેલા મિશ્રણનું પ્રદર્શન ઉત્પાદક દ્વારા પરીક્ષણ કરેલા પરિણામોથી અલગ હોઈ શકે છે.
ઉકેલ:
- ટાઇલ એડહેસિવમાં પોતાની રીતે સિમેન્ટ કે રેતી ઉમેરશો નહીં.
- પેકિંગ અથવા ટેક્નિકલ ડેટા શીટમાં દર્શાવેલી મિક્સિંગ પદ્ધતિ અનુસરો.
- સાઇટ પર મિસ્ત્રીને યોગ્ય મિક્સિંગ અને એપ્લિકેશનની તાલીમ આપો.
- મિશ્રણમાં વધારાનું મટિરિયલ ઉમેરવામાં આવ્યું હોય, તો તેને મૂળ પ્રોડક્ટની ગુણવત્તા સમાન માનવું નહીં.
મહત્વપૂર્ણ: સિમેન્ટ કે રેતી ઉમેરવાથી દરેક કિસ્સામાં ટાઇલ જરૂર છૂટી જશે એવું નથી. પરંતુ તે પ્રોડક્ટનું મૂળ ફોર્મ્યુલેશન બદલે છે અને બોન્ડિંગમાં ખામીનું સંભવિત કારણ બની શકે છે.
Site Inspection Checklist: What Should Be Checked When Tiles Come Off?
Before blaming the tile adhesive, inspect the failed installation carefully.
- Is the adhesive still attached to the wall or floor, or has it separated from the substrate?
- Is adhesive present on the back of the tile?
- Was the adhesive coverage adequate?
- Does the plaster or substrate crumble or produce dust?
- Was the adhesive mixed with the correct water quantity?
- Was the adhesive used within its open time and pot life?
- Is the selected adhesive suitable for the tile and installation area?
- Are there cracks, movement joints, or signs of building movement?
- Was the adhesive stored correctly before use?
- Was any extra cement, sand, or unapproved material added?
The location and condition of the failure can provide important clues about its cause. A proper inspection is more reliable than assuming that every detached tile is caused by poor adhesive quality.
टाइल निकलने पर असली कारण की पहचान कैसे करें?
टाइल निकलने के बाद इन बातों की जाँच करना ज़रूरी है:
1. टाइल के पीछे एडहेसिव कितने क्षेत्र में लगा हुआ है?
2. एडहेसिव दीवार पर रह गया है या टाइल पर?
3. क्या एडहेसिव के साथ प्लास्टर की परत भी निकल गई है?
4. क्या टाइल के पीछे धूल या कोटिंग है?
5. क्या साइट पर पानी, मिक्सिंग और Open Time के निर्देशों का पालन किया गया?
6. क्या प्लास्टर में सीमेंट की मात्रा और रेत की गुणवत्ता सही थी?
7. क्या मिस्त्री ने एडहेसिव में अतिरिक्त सीमेंट या रेत मिलाई थी?
8. क्या शिकायत केवल एक बैच में है या अलग-अलग बैच और साइटों पर भी आ रही है?
इन जाँचों से संभावित कारणों को अलग-अलग समझने में मदद मिलती है। आवश्यकता होने पर एडहेसिव और सतह की मजबूती का तकनीकी परीक्षण करवाना चाहिए।
ટાઇલ છૂટી જાય ત્યારે સાચું કારણ કેવી રીતે ઓળખવું?
ટાઇલ છૂટી ગયા પછી નીચેની બાબતો તપાસવી જરૂરી છે:
1. ટાઇલની પાછળ એડહેસિવ કેટલા વિસ્તારમાં લાગેલું છે?
2. એડહેસિવ દિવાલ પર રહ્યું છે કે ટાઇલ પર?
3. એડહેસિવ સાથે પ્લાસ્ટરનો પડ પણ નીકળ્યો છે?
4. ટાઇલના પાછળના ભાગમાં ધૂળ અથવા કોટિંગ છે?
5. સાઇટ પર પાણી, મિક્સિંગ અને Open Timeની સૂચનાઓનું પાલન થયું હતું?
6. પ્લાસ્ટરમાં સિમેન્ટનું પ્રમાણ અને રેતીની ગુણવત્તા યોગ્ય હતી?
7. મિસ્ત્રીએ એડહેસિવમાં વધારાનું સિમેન્ટ કે રેતી ઉમેર્યાં હતાં?
8. ફરિયાદ એક જ બેચમાં છે કે અલગ-અલગ બેચ અને સાઇટ પર પણ છે?
આ તપાસથી સંભવિત કારણો અલગ પાડવામાં મદદ મળે છે. જરૂર મુજબ એડહેસિવ અને સપાટીની મજબૂતીનું ટેક્નિકલ પરીક્ષણ કરાવવું જોઈએ.
Conclusion
Tile detachment is not always caused by the tile adhesive itself. The final performance of a tiled surface depends on several factors, including adhesive quality, correct product selection, substrate strength, surface preparation, mixing, application, environmental conditions, and workmanship.
Even a high-quality tile adhesive cannot compensate for a weak substrate, poor installation practices, or unsuitable site conditions.
For long-lasting tile installation, choose the right adhesive, prepare the surface properly, follow the manufacturer's instructions, and ensure that trained installers use the correct application methods.
The location and condition of the failure can provide important clues about its cause. A proper inspection is more reliable than assuming that every detached tile is caused by poor adhesive quality.
निष्कर्ष
टाइल निकलने की समस्या का वास्तविक कारण जाने बिना केवल टाइल एडहेसिव को जिम्मेदार ठहराना सही नहीं है। एडहेसिव की गुणवत्ता, प्लास्टर की मजबूती, रेत की गुणवत्ता, टाइल की पिछली सतह, सही ग्रेड, मिक्सिंग और साइट पर लगाने की विधि — इन सभी का मूल्यांकन करना ज़रूरी है।
सही एडहेसिव का चुनाव करने के साथ-साथ मजबूत सतह, सही मिक्सिंग और सही एप्लिकेशन का भी उतना ही महत्व है।
याद रखें: टाइल निकलने पर दोष देने से पहले वास्तविक कारण पहचानें, सही जाँच करें और उसके बाद ही समाधान तय करें।
નિષ્કર્ષ
ટાઇલ છૂટી જવાની સમસ્યાનું સાચું કારણ જાણ્યા વિના માત્ર ટાઇલ એડહેસિવને જવાબદાર ગણવું યોગ્ય નથી. એડહેસિવની ગુણવત્તા, પ્લાસ્ટરની મજબૂતી, રેતીની ગુણવત્તા, ટાઇલની પાછળની સપાટી, યોગ્ય ગ્રેડ, મિક્સિંગ અને સાઇટ પરની એપ્લિકેશન — આ બધાંનું મૂલ્યાંકન કરવું જરૂરી છે.
યોગ્ય એડહેસિવની પસંદગી સાથે મજબૂત સપાટી, યોગ્ય મિક્સિંગ અને યોગ્ય એપ્લિકેશનનું પણ એટલું જ મહત્વ છે.
યાદ રાખો: ટાઇલ છૂટી જાય ત્યારે દોષારોપણ કરતાં પહેલાં મૂળ કારણ શોધો, યોગ્ય તપાસ કરો અને ત્યાર પછી જ ઉકેલ નક્કી કરો.
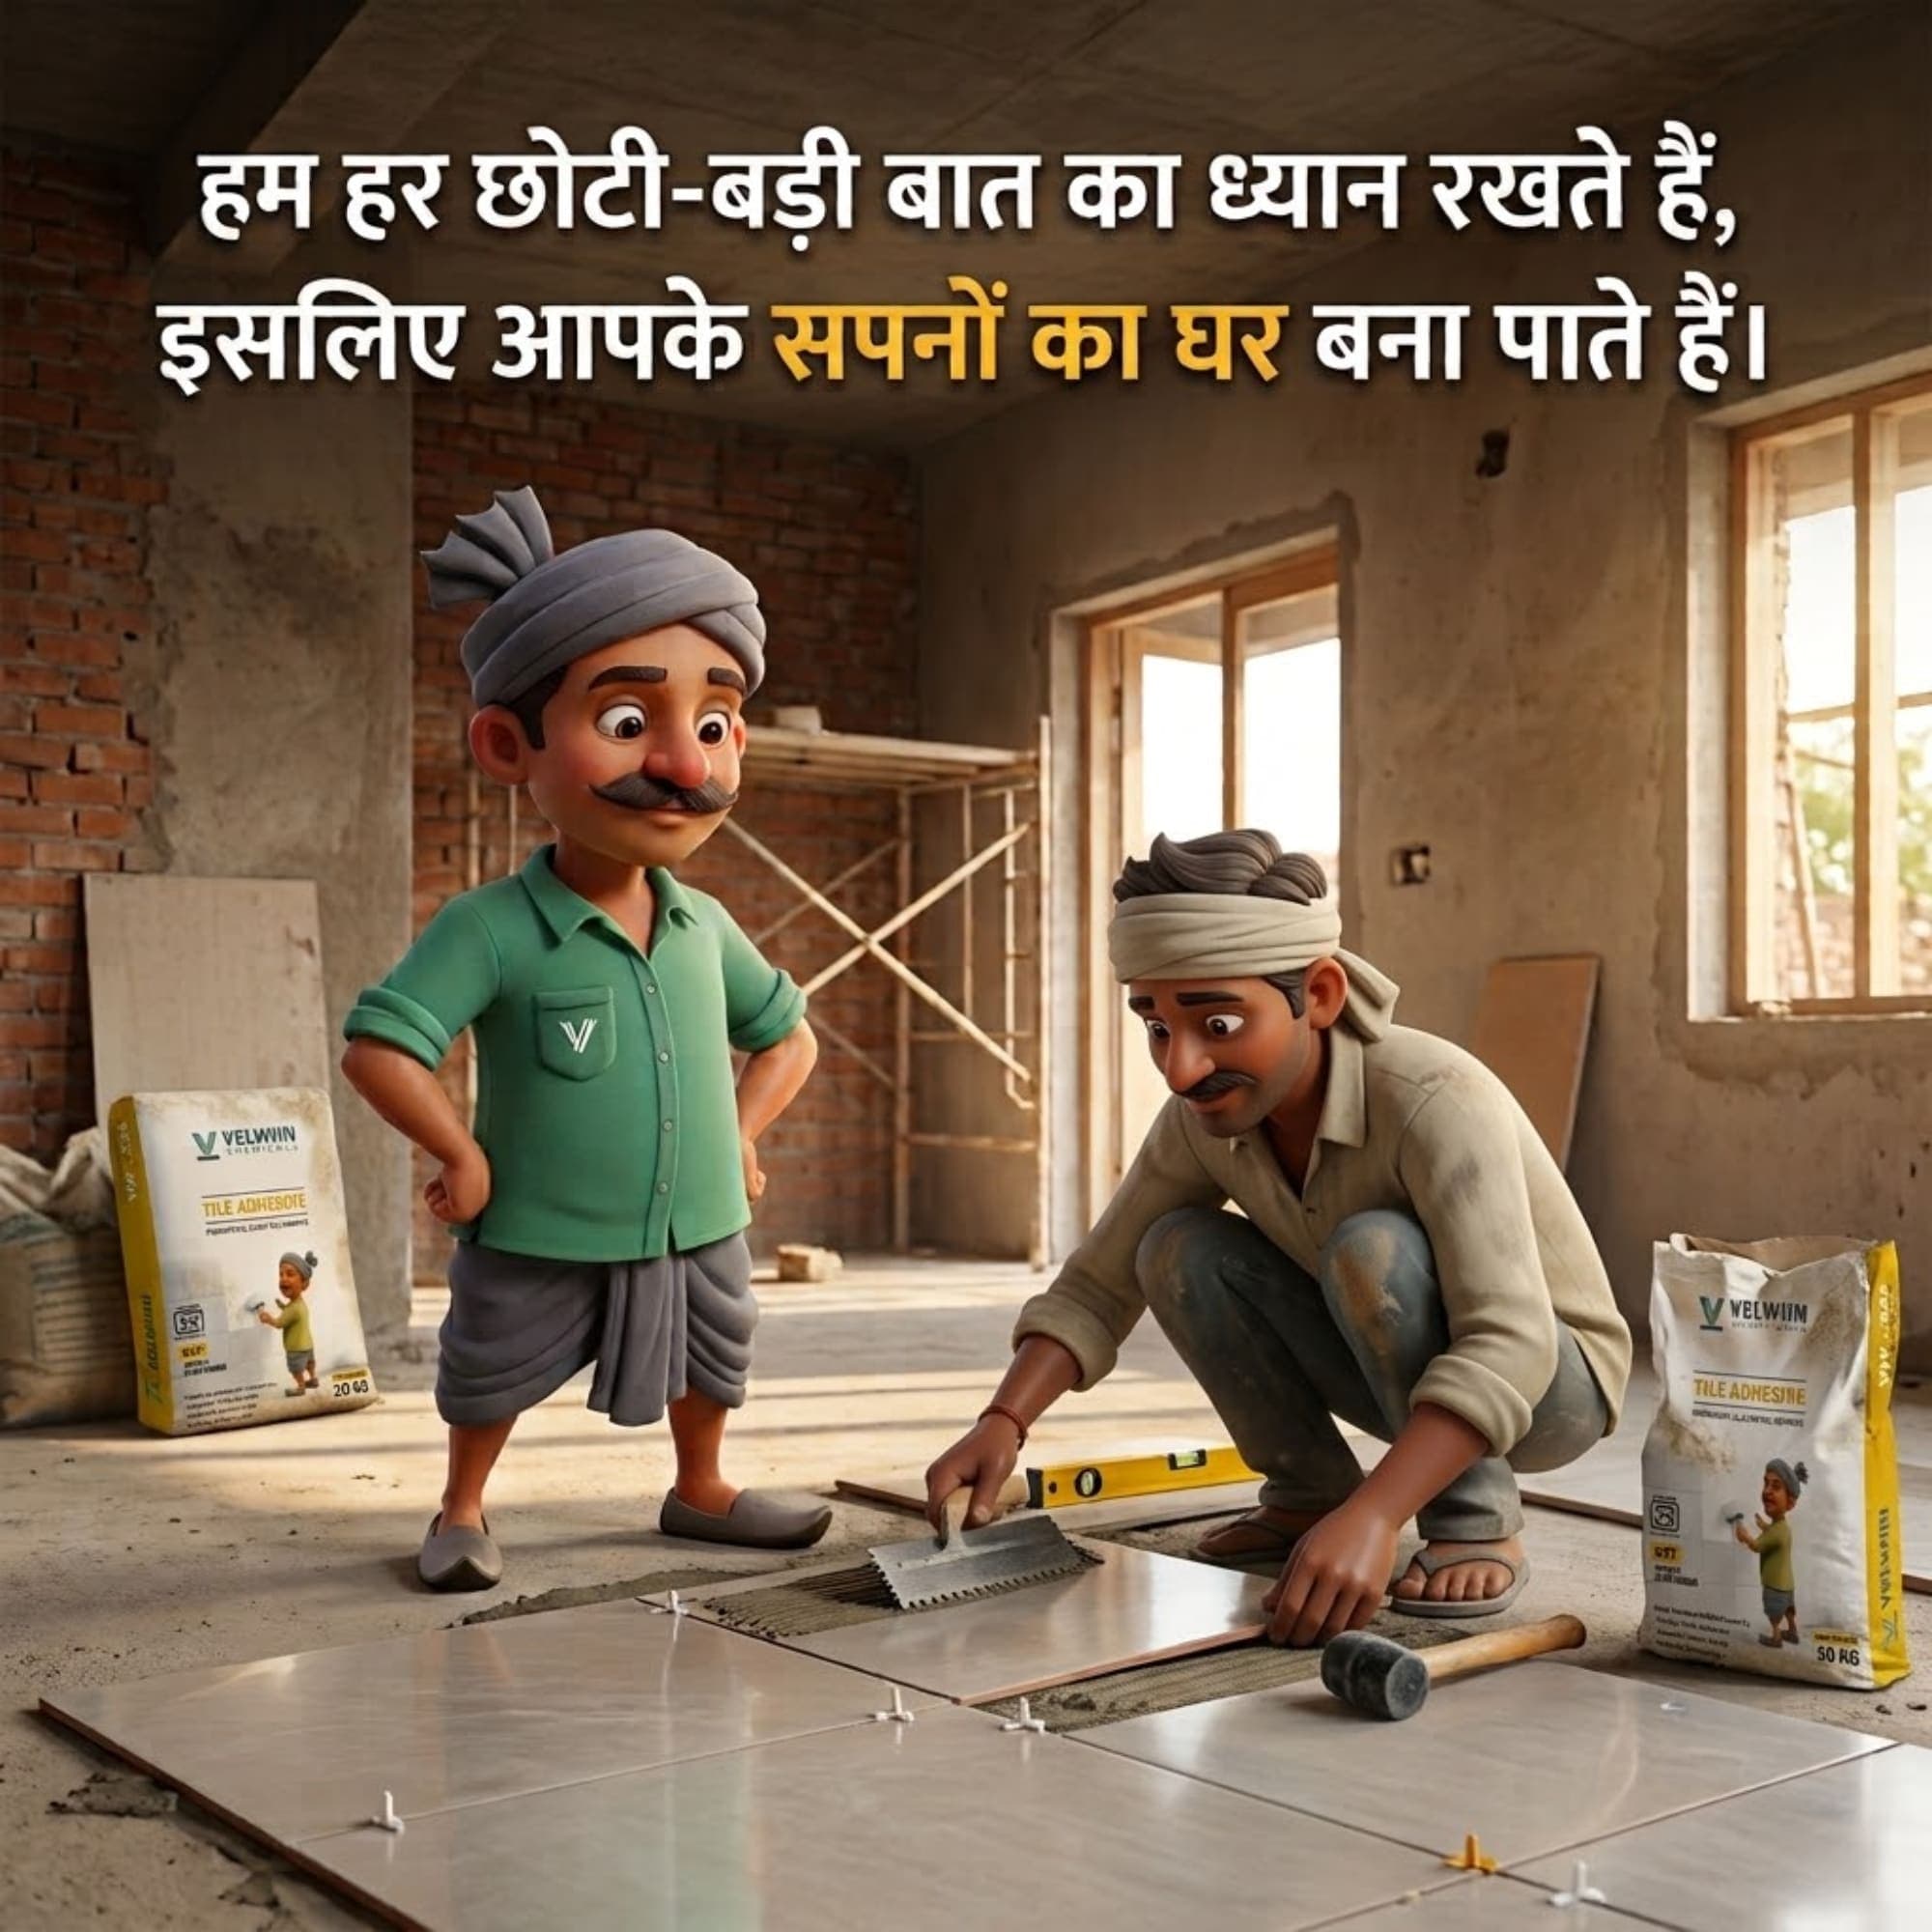
Velwiin Chemicals is committed to supporting better construction practices through reliable tile adhesive and construction chemical solutions. Always select the appropriate product for your application and follow its technical guidelines.
Contact Velwiin Chemicals
Mobile: +91 9909775135
Website: www.velwiin.com
गुणवत्ता, सही मार्गदर्शन और विश्वसनीय निर्माण समाधानों के लिए प्रतिबद्ध।
Choose the right product. Follow the right process. Build with confidence.
ગુણવત્તા, યોગ્ય માર્ગદર્શન અને વિશ્વસનીય બાંધકામ ઉકેલો માટે પ્રતિબદ્ધ.
#why tiles come off#tile adhesive failure#why tiles become loose#tiles falling off wall#tile detachment causes#tile adhesive problems#reasons for tile debonding#tile installation mistakes#tile bonding problems#tile adhesive not sticking#common tile installation problems#how to prevent tiles from falling off#tile adhesive application mistakes#why tiles become hollow#weak plaster causing tile failure#adding cement to tile adhesive#best tile adhesive for porcelain tiles
Have questions about this topic?
Our technical team can provide product recommendations and specifications tailored to your project requirements.
Contact Technical Team